Garlic Harvest

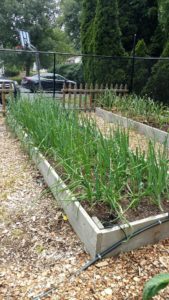
The 4th of July means a lot of things to a lot of people, but for me it serves as a reminder that a garlic harvest is upon us.

Being raised in an Italian America family that loved to garden I tend to plant a lot of vegetables that are familiar with an Italian or Mediterranean diet. One that I plant every year is garlic. I put it in the ground around Columbus Day (big day for Italians) and dig it out around the 4th of July (big day for Americans).

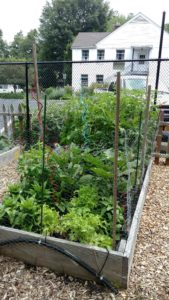
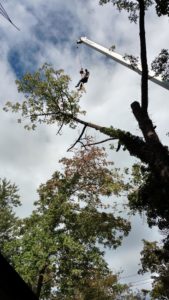
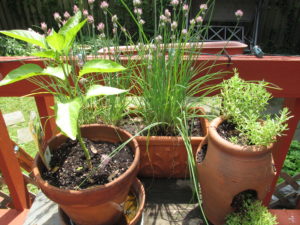
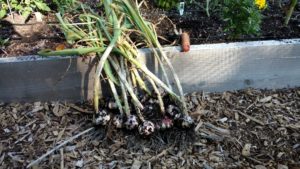
This year the weather turned real hot and garlic doesn’t like the heat. Once more than half the leaves start to turn and dry out, it’s time to dig the garlic up. I really felt it needed more time to get bigger bulbs, but if you ignore the signs that it’s ready you run the risk of it splitting. A few posts back I talked about cutting the Scapes (pictured below) in hopes of getting bigger bulbs. Now was the time to see how things worked out.

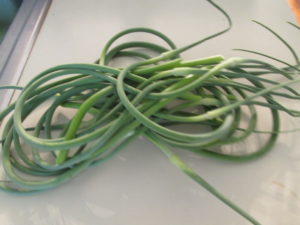
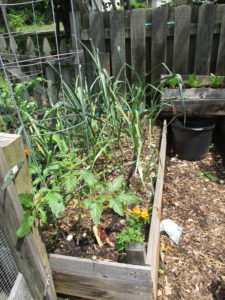
Just a few of the Garlic Scapes harvested about 3 weeks ago.

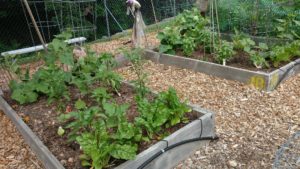
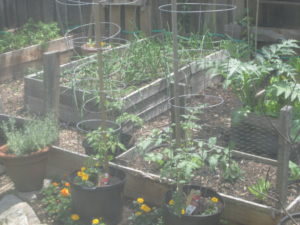
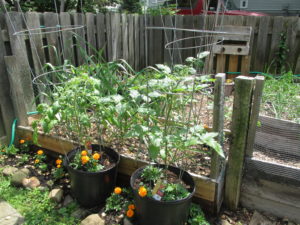
So, below are a few shots from my 2017 batch and some from this year. 2018 was a weird year for garlic. We had an early, bitter cold winter followed by a mild February that turned into a three month period when it felt like winter would never end. June was nice but dry and along comes the 4th and we’re hitting almost 100 degrees with high humidity every day. Not a good run for garlic.

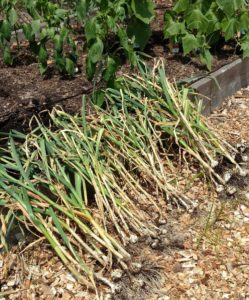
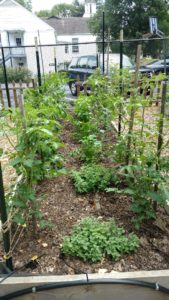
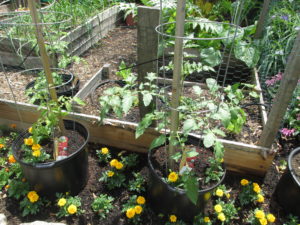
2018 Garlic – Some good, some not so good
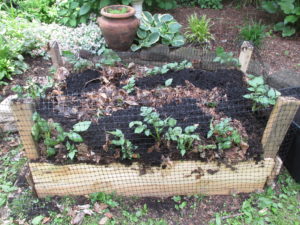
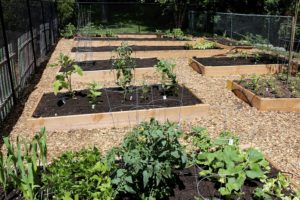
2017 Garlic

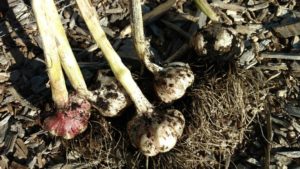
2017 Garlic – More larger heads

So the bulbs were for the most part small but with almost zero splitting, whereas last year I played roulette with the weather and kept them in the ground to long. I ended up with a few splinters. All in all, I should have plenty of garlic to last a good 4 or 5 months and well being Italian, I’ll come up with plenty of uses.

Check out Gracie’s Garlic Rigatoni with Zucchini. Zucchini, another vegetable that grows in my Mediterranean garden. This recipe really gets its kick from a generous amount of garlic. Find this recipe and many more in our Mediterranean Diet Recipe Book.

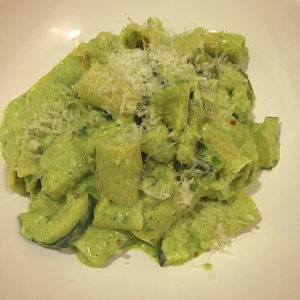
Rigatoni and Zucchini

Ingredients:

1 lb. Rigatoni
1/2 Tbsp. butter
1/2 cup olive oil
4 cloves of chopped garlic
2-3 shallots finely chopped
2 mid size zucchini sliced in half moons
salt and pepper to taste
1 cup chopped Italian parsley

Add rigatoni to boiling salted water and cook till al Dente.

In a frying pan melt the butter and add the olive oil, reserving a bit for later. Sauté the garlic, and shallots about 2 minutes and then add the sliced zucchini, salt and pepper. Continue to cook gently about 5 minutes, stirring lightly.

When the rigatoni is ready, drain and put back into the pot. Add your remaining olive oil to keep it from sticking. Pour the zucchini mixture over the pasta and toss gently while continuing to cook for 2 to 3 minutes.

Place on a platter, sprinkle chopped parsley with some grated Parmesan cheese over the top.


photo by: naotakem

What Every Gardner Needs to Know About Mulching

I spent the good part of the last three days mulching my garden beds. It would have been nice if I read this article in Organic Life before I started.


Growing Vegetables in Raised Beds – More Pros than Cons

I garden almost exclusively in raised beds and find that the pros significantly outweigh the cons. Let’s take a look below.

There are m,any pros and a few cons in choosing to garden with raise beds.

There are many pros and a few cons in choosing to garden with raise beds.

Pros –

You Pick the Soil – This is by far the biggest asset to raised bed gardening. I will get into this in more detail in an upcoming post, but being able to choose what I want my soil made from is a big plus. I prefer a soft soil that drains well.

Since I plant many root crops like onions, carrots, garlic and potatoes, having a soft texture to my soil, free of rock, is a must. I use a combination of organic material, like compost, leaf mold, sphagnum peat moss and coco cure to make up the bulk of the soil bed. I also add worm castings, a fine organic fertilizer and rock dust. Again, more on this in a future post.

Root crops like onions and garlic prefer a light, soft texture to allow them growing room.

Root crops like onions and garlic prefer a light, soft texture soil to allow them growing room.

Extend the Growing Season – Raised beds heat up faster allowing you to plant earlier in the Spring. Here in the Northeast winters seem to last forever, with freezing temps well into April.

Raised beds allow early planting of many garden favorites like cauliflower, broccoli, spinach and most lettuce varieties to just name a few. The earlier I can start eating out of my garden the better I feel.

Chard started in mid March is seen still thriving in late May.

Chard started in mid March is seen still thriving in late May.

Improve Drainage – Raised beds filled with the right soil combination will drain significantly better than your typical garden bed.

Proper drainage is important, especially in areas prone to rainy seasons and heavy downpours. The last thing you want is excessive moisture drowning out your plants roots. Good drainage is also important if you plant in pots.

good drainage is important in pots as well as raised beds.

Good drainage is important in pots as well as raised beds.

Eliminate Traffic in your Bed –Traffic, be it foot, animal or kids has an adverse effect on your garden bed by compacting the soil.

As mention earlier we’re looking to keep out soil soft and healthy to achieve proper aeration. Raised beds act a barrier against unwanted traffic and also keep you the gardener from compressing the soil with your feet.

Other benefits of raised beds include better weed control, less bending and stress on the body, as well as having your plants avoid contact with contaminates like lead and other harmful chemicals that may be present in your soil. Raised beds also make smart use of your space and just look nicer.

Cons –

The above pros may have you halfway out the door with your plans on starting a raised bed garden. Wait they are some things you need to consider before you make the leap to raised beds.

A drip irrigation system to your rasied beds is useful when the season turns hot and dry.

A drip irrigation system to your raised beds is useful when the season turns hot and dry.

Cost  and Time – a big factor. I made most of my raised beds from recycled material found at construction sites and from discarded pallets. I spend little money but a great deal of time, and as dad always said, “Time is Money.”

If you plan to purchase raised beds (and I provide a few links below) realize they could be costly. Many of the beds available are really attractive and if you have the cash, go for it. If you decide to build them yourself, the best material is cedar wood which is not cheap but will last longer.

Maintenance – Raise beds are usually made from wood and over time will need to be replaced or repaired.

Additional and more importantly is that your soil will need to be amended each year and will cost you a few bucks each season. Also raised beds and a rototiller don’t get along to well, so the work of soil amending is a bit physical and more hands on.

Raised Beds Can Heat Up – Earlier I mentioned how raised beds retain heat and allow you to get a jump on the growing season. Well they don’t cool down any faster in the hot dry dog days of summer.

You can expect to water more often especially in drier regions. If you should be away from your beds for any length of time, be certain to make arrangements to have the beds watered daily. I installed a drip irrigation to my beds set on a timer, I highly recommend this.

Links to some cool raised beds:


Garlic Scape Pesto

Garlic Scape Pesto is just an added bonus that comes with growing your own garlic.

Every year around Columbus Day, I set out 30 to 40 garlic bulbs with enthused anticipation of a banner July harvest. As you would expect from a website devoted to Mediterranean dishes, we use a lot of garlic. Growing our own just makes sense.

A tomato growing as a companion to our garlic plants.

A tomato growing as a companion to our garlic plants.

Here in the Northeast we grow hard neck garlic. Garlic comes in two varieties, hard and soft neck. As the name implies, hard neck or soft neck refers to the texture of the stem. It is commonly agreed that the hard neck varieties do better in colder, northern climates. This is important, since the crop over winters. Hard necks are also more likely to produce a scape than their soft neck cousins.

Just a few of the Garlic Scapes harvested this week.

Just a few of the Garlic Scapes harvested this week.

What exactly is a scape? Scapes are the flowering bud of the garlic plant which begin to form late May. If left alone the plant will put most of its energy into producing the flower and little into the bulb. Harvesting the scape, by simply cutting them off, is believed to produce a larger garlic bulb.

The scapes are full of flavor and should not be discarded to the compost heap. Uses include but not limited to marinades, stir fry ingredient and of course a great pesto. Below is Gracie’s killer garlic scape pesto.

By the way, if you don”t grow your own garlic but still want scapes, Farmers Markets this time of year have plenty and are your best bet in finding them.

Garlic Scape Pesto
 
Author:
Recipe type: Mediterranean
Cuisine: Italian
 
Ingredients
  • ½ cup olive oil
  • 1 cup fresh basil
  • 6 garlic scapes
  • ½ cup grated Parmesan or Romano cheese
  • 1 tablespoon unsalted butter
  • twig or two fresh parsley
  • pine nuts (optional)
  • ¼ cup fresh lemon juice
  • salt and pepper to taste
Instructions
  1. In a food processor combine all the ingredients except the olive oil.
  2. Begin pulsing the ingredients and slowly add the olive oil until you reach the consistency and color you desire.
  3. Pesto can be used in a great number of recipes, so make a bunch.


Sustainable Living – In Tune with a Mediterranean Lifestyle

The Mediterranean Lifestyle seems to fit perfectly with today’s move towards sustainable living. Here’s a look at how we’re making the connection. It’s a revolution that happens one household at a time.

About two years ago I had an old and diseased Ash tree removed from my side yard. The cleaned space, loaded with sunlight, allowed me to put up a raised bed garden. I set out to use only recycled and organic materials and was able to achieve my goal through the use of materials found locally.

Not an easy job, but these guys were good.

Not an easy job, but these guys were good.

This picture doesn't do justice to the size of this old Ash tree.

This picture doesn’t do justice to the size of this old Ash tree.

This guy is under paid!

This guy is under paid!

The pictures below tell the story. The beds are constructed from pallets and discarded lumber found at work sites. The soil is 100% organic, composed of compost, coco core, worm castings and rock dust,sold commercially as Azomite. More on my raised bed soil mix in a future post.

All the beds are made with recycled materials. Right down to the nails.

All the beds are made with recycled materials. Right down to the nails.

I save space by growing in pots as well. Here are a few of my 10 tomato plants

I save space by growing in pots as well. Here are a few of my 10 tomato plants

I'm trying artichokes for the first time. Lettuce gets plenty of shade from these plants thus extending the season.

I’m trying artichokes for the first time. Lettuce gets plenty of shade from these plants thus extending their season.

A potato box, again made with recycled material.

A potato box, again made with recycled material.

I grow my tomatoes in pots using the same soil breakdown and it works great for these shallow rooted plants. This year I added a potato box, again made from recycled materials. I hill the potato plants using leaf mold made from collected leaves and grass clipping. I use zero chemicals on my lawn and flower beds so I have little issue with the leaves and clippings. Once the growing season is over I plan to return the material in the potato box to the compost pile. A 100% sustainable and recyclable soil mix.

Herb pots get plenty of sun on the back deck.

Herb pots get plenty of sun on the back deck.

Marigolds help keep insects at bay and add color to the garden.

Marigolds help keep insects at bay and add color to the garden.

So, moving forward this is what you can expect from GraciesRavioli.com. We’re going to take you out of the Supermarket and into the Farmers Market. We’re lead you away from microwavable meals and get you back in the kitchen preparing quick, wholesome family friendly meals. We’re going to show how you can make a difference in what you feed your family and help you grow it.

Join the revolution, that starts with food, one household at a time!


February Snow Heightens Thoughts of Spring Garden

We got a foot of snow a few days ago and I’m sure the last thing on most people’s mind is their spring garden. Not here, I spent a good part of my snow day planning my new Italian vegetable garden.

February is the perfect time of year for all serious gardeners to begin the seed selection process. If you’re like me the mailbox most likely brings you a new seed catalogue every day and your email box is filled with the latest garden special.

Companies like Burpee, Parks, Johnnny’s Seed and countless others offer so many varieties that making the final decision on what to grow almost impossible. Here are the five things I do to cut through the clutter and make my final selections.

Hot peppers, etc

(Photo credit: Wikipedia)

  1. Grow What You Eat – Sounds simple enough, but I can’t tell you how many times I purchased seeds based on a recommendation or a pitch in a catalogue. Once the seeds arrive everyone in my family looks at the seed packet like it was a product from mars.  I talk on this blog many times about my grandfather’s garden. His process was simple, he grew what everyone in the house ate. Tomatoes, zucchini, basil, a few lettuces, eggplant and peppers.
  2. Grow What You Enjoy GrowingAnother simple sounding principal but also an area where many gardeners get a little off track. I belong to a Community Garden at my church. 25 plots managed by 25 dedicated gardeners (see photo below). I am surprised each year by how many of these hardened growers moan and grown about how difficult it was to grow a certain variety or crop, or complain about how much space the squash took up. If it causes you anguish than don’t grow it.
  3. Grow What Fits – Let’s face it, that 25 foot by 25 foot plot is just not going to house 5 different varieties of tomatoes, zucchini, eggplant, beans, peas and the host of other plants that you purchased on a whim. Plan you garden carefully and cut back where needed. Last fall, I took down a huge Ash tree that was diseased and it left me with a nice new 15 by 20 foot area in the perfect south/eastern part of my property. I started pouring through the seed catalogues and had a list a mile long. Common sense prevailed and I didn’t waste a lot of money on seeds that would never see soil.
  4. Grow Something New – Growing the same old-same-old each and every year can cause one to loose their enthusiasm for gardening. Never grown Kale, but find that the family enjoys it and you got a row available, give it a shot. I really enjoy artichokes (see recipe below), but never looked into growing them, as I heard bad things. With my new plot, I decided to  investigate the possibility of devoting them a row. I purchased two seed packets, one from High Mowing Organic Seed Company, a Tavor Artichoke and from Parks an Imperial Star Artichoke. I can’t wait to give these a whirl.
  5. Grow What Works – Don’t mess around with growing vegetables that have garden requirements that you can’t meet. It’s just a waste of time to try growing lettuce or other greens in the heat of summer just as it would be to put tomatoes, peppers and the like out before the last chance off frost has past. Make sure you get enough sun for what you growing and pay close attention to the seed packet or seedling instructions regarding spacing, sun requirements and watering/feeding suggestions. If you can’t supply what the seed or seedling needs, pass on it.

community garden photoSpring shot of our Community Garden 2016

Gracie’s Stuffed ArtichokesFrom “7 Days of Italian Cooking”

Ingredients:                              
  • 4 medium artichokes
  • 1  cup extra virgin olive oil (more if needed)
  • 1/2 cup fresh Italian parsley
  • 2 or 3 chopped cloves of garlic
  • 2 1/2 cups of  seasoned Italian breadcrumbs
  • 1/2 cup grated Parmesan cheese
  • 1/2 tsp. dried oregano
  •  salt and pepper to taste
Take each artichoke and cut off the stem, so the base is flat.  Remove the bottom most leaves and trim with a kitchen scissors the remaining, easy to get leaves.  Cut off the top 1/2 inch of the artichoke.  Wash the artichokes in cold water and spread open so they can accept the stuffing.  Combine all your stuffing ingredients in a bowl and mix with the olive oil until you get a good consistency.  With a spoon fill the center of the artichokes with the filling and spread some around the leaves. 
Steam the stuffed artichokes by standing them on their base in about 2 inches of water in a pot and cover.  Steam for about 30 minutes but check to make sure the leaves pull away easily from the artichoke.  I always liked to put a little of the stuffing on the leaf as I ate the meaty end of the artichoke leaf. Sprinkle a bit of grated Parmesan over the top.

Super Wings for a Super Game

I posted this recipe before, but felt I had to share it once again with the Big Game coming our way tomorrow. No matter who your guest are routing for, these wings will be the big winner

Wilson official NFL extreme football

We call these wings, Gracie’s Not So Secret Wings.”  It seems that since the last time I posted this the secret is even less secure.

Dipped in the hot sauce prior to baking and then hit with a second round when they come out of the oven, you’re going to need a fire extinguisher close by for some of your less than hearty guest.

Bowl of "Wings"

Ingredients:

  • 3/4 cup of all purpose flour
  • 1/2 tsp. cayenne pepper
  • 1/2 tsp. garlic powder
  • 1/2 tsp. sea salt
  • 20 chicken wings (adjust ingredients if making more)
  • 8 Tbsp. melted butter (I didn’t say these were good for you, just good)
  • 3/4 cup of your favorite hot sauce ( I use a combo of Franks and Scotch Bonnet)
  • 1 1/2 Tbsp. white vinegar
  • 1/2 tsp. Worcester Sauce

Line a baking sheet with foil and lightly grease with cooking spray.  Place the flour, cayenne pepper, garlic powder and salt into a resealable freezer bag and shake well.  Add the wings a few at a time and coat with the mixture.  Place the wings on the cooking sheet and refrigerate for one hour.

Preheat oven to 400°.  Just prior to baking whisk together, in a saucepan, the melted butter, hot sauce, white vinegar and Worcester  Sauce.  Add a touch of the cayenne pepper if you’re really into hot.  Over low heat bring the mixture to a simmer.

With a pair of tongs, dip each wing into the butter mix and return to the baking sheet.  Be sure to reserve some of the butter mix or make more if needed.  Bake for around 45 minutes or until the wings are nice and crispy and cooked through.  Remove from the oven and coat with additional butter mixture.

Super Wings for a Super Game
 
Author:
Recipe type: Appetizer
Cuisine: American
Prep time:
Cook time:
Total time:
 
Wings so hot you'll need a fire extinguisher near by.
Ingredients
  • ¾ cup of all purpose flour
  • ½ tsp. cayenne pepper
  • ½ tsp. garlic powder
  • ½ tsp. sea salt
  • 20 chicken wings (adjust ingredients if making more)
  • 8 Tbsp. melted butter (I didn't say these were good for you, just good)
  • ¾ cup of your favorite hot sauce ( I use a combo of Franks and Scotch Bonnet)
  • 1½ Tbsp. white vinegar
  • ½ tsp. Worcester Sauce
Instructions
  1. Line a baking sheet with foil and lightly grease with cooking spray. Place the flour, cayenne pepper, garlic powder and salt into a resealable freezer bag and shake well. Add the wings a few at a time and coat with the mixture. Place the wings on the cooking sheet and refrigerate for one hour.
  2. Preheat oven to 400°.
  3. Just prior to baking whisk together, in a saucepan, the melted butter, hot sauce, white vinegar and Worcester Sauce.
  4. Add a touch of the cayenne pepper if you're really into hot.
  5. Over low heat bring the mixture to a simmer.
  6. With a pair of tongs, dip each wing into the butter mix and return to the baking sheet. Be sure to reserve some of the butter mix or make more if needed.
  7. Bake for around 45 minutes or until the wings are nice and crispy and cooked through. Remove from the oven and coat with additional butter mixture.


New Year – New Focus at Gracie’s Ravioli

My wife recently took part in a survey and was asked, “What’s your favorite website?” She told me that unless I start writing and posting again she couldn’t answer GraciesRavioli.com. This was just the kick in the butt I needed to get back into this blog and start writing about the things I love.

LZ98_001_0032_11DMSo here we go. A new year with a new focus. You can expect the usual with this blog, great recipes, stories that inspired those foods, super wine suggestions and more. One new aspect that we will be covering regularly is the Italian Garden. I love being outdoors and working in the garden. There is nothing better than growing your own food. Let’s be real here, you just can’t compare a Tomato from the garden and one purchased from a supermarket.

Growing up my grandfather put up a huge garden each and every year. His staples were tomatoes, basil, zucchini, eggplants and peppers. In fact we had some many peppers that I can remember eating peppers and eggs nearly every morning once the garden went to harvest.

Another change to the site will be to keep the stories short and the focus on food, wine and the garden. So with that be said, check out Grandmas peppers and eggs recipe.

So just a few housekeeping notes. Grandma always used green peppers. Most likely because the red ones took longer to harvest and we just had so many greens. You can use either or a combination of both as I do. I cook my peppers until they are soft. Again this is a preference, but I think it makes a better sandwich.

English: Green, yellow and red bell peppers fr...

(Photo credit: Wikipedia)

Ingredients

    • 4 green or red Peppers, seeded and sliced.

    • 4 large eggs, scrambled in bowl with 1 tbs water added

    • 1-2 cloves garlic chopped

    • 1/4 cup olive oil for cooking

    • salt and pepper to taste

    • grated Parmesan

    • 1 loaf of Italian bread or 4 crusty rolls

    • crushed red pepper

    • mild or hot Gardinera (optional)

Preparation:

In large skillet add olive oil and garlic and saute on low-med until garlic is soft and changes color. Add peppers, season with salt and pepper, stirring to coat peppers with oil.

Continue cooking on low-med heat, stirring frequently, until peppers are soft. Raise heat to med-high and add eggs, stirring well so that the peppers and eggs combine into one. Cook eggs until ready, but please don’t burn them or the peppers. Sprinkle with cheese and red pepper serve on the Italian bread or roll and add Gardiner if so desired.

Grandpa Loved His Eel

I don’t know why, but I’m feeling a bit nostalgic today. My son has some friends over (Election Day, no school) and it has me thinking back to my childhood.  Years ago I wrote a story for yahoo that spoke to my grandfather’s love of fishing, and especially for eel. I thought I would share it with you today. 

As a child I grew up in a house owned by my grandparents. They were both truly unique people having immigrated from a tiny seaport village in southwest Sicily named Sciacca (see the photo below). My grandfather was a fisherman by trade and when he started his family here in the United States he worked at the Fulton Fish Market in New York City. After a few years he moved his growing family out of Manhattan into a northern suburb and opened a seafood business.

Grandpa, as we all affectionately called him, was an astute businessman. He quickly recognized the need to grow his market and three days a week he packed his tiny 1920s ford pickup with fresh fish and sold to the many restaurants, hotels and beach clubs in the area.

As kids we were always treated to stories as to how during prohibition he would make his own whiskey and rye, each of his 8 children having a job from corking the bottle to placing the label on the front of his secret concoction. When visiting customers and after the fish were selected, those in the know would ask him “what else you got for sale today Frank.” Grandpa would move the fish to one side and under the ice was… well you figure it out.

My memories of my grandfather start in the late 50s. Long retired he used to spend his days fishing off the pier at Hudson Park in New Rochelle, our hometown (see a snap shot below). Late in the day both my mom and grandmother would worry and it was my job to make the hike to the park making sure he was OK.

 Hudson Park

As he aged the trips to the park disappeared and he would spend his days sitting on the front porch, occasionally tending to his tomato plants. From time to time he would get up and slowly walk to back of the house. He would always shout out to me, Michalosa, I’m a going back to Sciacca.” A few minutes later he would announce his return and tell me with a grin, how beautiful Sciacca was this time of year.

Sciacca has not changed much from when my Grandfather fished this pier.

I knew than that he wished for nothing more than to return to his roots and visit once again the land of this childhood. Unfortunately that never happened, as he passed away in 1963 at the age of 83. Throughout the years I always promised myself that I would make that journey back to this ancestral village in celebration of his life.

Years of talking about this trip turned into decades and as I myself got older the idea of visiting Sciacca faded. One day my youngest was asking questions about my childhood and at that point I leaned over to my wife and said, “We need to take the kids to Sciacca.”

So this past Easter of 2012, me and nine members of my family made the pilgrimage to the land of my grandparents. Once there it felt like I was returning home. My grandmother was a great cook and many of the different foods she made for us came right from this Sicilian village. As expected, one thing that easily stood out was the seafood.

Sciacca is still to this day an active fishing village and I must have felt a hundred times that I saw my grandfather walking down to the boats to start his work day. Restaurants in Sciacca specialize in fish, but there was one dish that took me right back to those days when I meet grandpa at Hudson Park, and that was the Eel.

In Sciacca the dish is called “Matalotta” or conger eel. I took the recipe (see below) from “Treasures of Sicilian Cuisine” published by Advert Edizioni, which I picked up in the neighboring village of Agrigento. My grandfather’s version is a little different and well, adds a little flavor.


Fresh Eel

You see, on those days when he was late getting home, I would meet him and carry his bucket with the fresh catch. Grandpa love eel and fished for it with great success. When we got back to the house we would go down to the basement where he set up his own private kitchen.

Hanging the eel from a hook, he would peel off the skin and cut the eel into 1 ½ inch fillets. He would than dip the eel steaks in an egg mix, season and roll in breadcrumbs. He would immediately transfer to a hot skillet with extra virgin olive oil. To this day I swear, those little fillets were still squirming in the pan.

When done, he would cut off a piece with a fork and offer it up to me saying, “mangia Michalosa.” Being only 10 years of age I refused, claiming I was still full from lunch. That always brought out a chuckle from grandpa. Finally one day I got up the nerve and took a little bite. Well like the eel, I was hooked. I can remember running upstairs and telling my mother how much I liked the eel and what a great cook grandpa was. My grandmother would laugh and I mother would just shake her head in disbelief.

My wife informs me that I tell this story every time we go out for sushi. That may very well be the case, but those days with my grandpa and the Hudson Park Eel are truly special memories.

Matalotta:

  • 2 pounds of filleted and chopped eels
  • 1 onion Handful of chopped parsley
  • 5 peeled tomatoes
  • 3 tbsp extra virgin olive oil
  • Salt and pepper to taste

Clean and wash the eels, then dry and add some salt. Mince the onion and brown it in some olive oil. Add the chopped tomatoes, some parsley and let simmer for a few minutes. Pour a cup of hot water and let boil. Add a touch more salt and pepper and the eel and continue cooking for no more than 10 minutes on a low flame.

Find this recipe and many other Sicilian Seafood dishes in Gracie’s Christmas Eve Recipe Book – Night of the 7 Fishes

Gracie's Christmas Eve Recipe Book - Night of the Seven Fishes (Gracie's Italian Living Series 2)


photos by: &