Rediscover Rice – Our Superfood for March

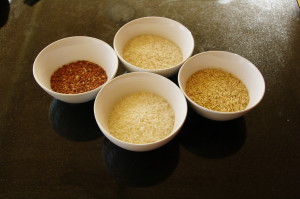
Get To Know Your Rice Varieties

 With more than 40,000 varieties worldwide, we thought we’d keep our sanity by narrowing the list down to those we most likely could find in a store.

 To begin, let’s look at a few basic rice facts. Rice is a grain that grows in fields or paddies and has three edible parts; the bran, germ, and endosperm. Rice that has been milled and polished to remove the hull, bran, and germ is called white rice. Rice that has been hulled only, leaving the bran and germ intact is called brown rice. Brown rice and white rice are not actually species or varieties of rice, but are more accurately the result of a process.

Now that we have that straight, let’s take a look at what we would most likely find on a grocery shelf in America when we shop for rice.

IMGP7336

Brown Rice

This rice is usually considered ‘whole grain’ rice, basically because the rice was not milled, leaving much of the bran and germ intact. Only the hull is removed. Brown rice is available in long grain, medium grain, and short grain. Long grain brown rice will remain somewhat separated when cooked, while medium and short grain brown rice kernels will tend to cling together more when cooked. All brown rice has a light, nutty flavor due to the remaining bran. Brown rice offers more fiber and the nutritional benefit of the bran and germ. You will need more cooking time for brown rice than white rice, but the delightful nutty flavor of brown rice may be worth the wait.

White Rice

This is another generic term used more to describe the rice than to name a variety. White rice is processed to remove the hull, bran, and germ, leaving just the internal endosperm, which is white. White rice can also be purchased in long grain, medium grain, or short grain, but all cook up a bit stickier than any length brown rice grain. Enriched white rice has been added to American shelves since a severe shortage in folic acid was found to be the cause of birth defects. Other nutrients have been added back into white rice, as well.

Arborio Rice

This rice is sometimes mistakenly called risotto in America. The grain gets its name from a town in Italy where it is grown. Arborio rice is used to cook the dish, risotto, which is a very creamy dish created by adding liquid to the rice, stirring, then adding more liquid and stirring some more until the liquid is absorbed and the rice is tender.

Jasmine Rice

If you cook any Asian dishes, you might know this rice. With a super sticky finish, this rice is perfect for dishes that need to hold up under a lot of ingredients. The texture is very popular in stir fry meals. The rice is also very fragrant.

Basmati Rice

This rice is from India. When cooked, it stays fluffy and separates. Although some may confuse it with Jasmine rice, they are not similar. This rice has an aroma, but it is not like Jasmine. Once you learn the difference, you will not confuse the two.

file8141339581121

Converted Rice

This is a process which produces an ‘instant rice’ to some degree. The rice grain is steamed before milling, resulting in a shorter cooking time. This may be handy, but the nutrients are compromised during the processing. Any rice that has a reduced cooking time was processed to a great degree.

Of course, this just covers the basics of the rice varieties found on the grocery shelves in the United States. Since we know there are over 40,000 varieties worldwide, we know we are missing some important rice choices to enjoy. This simple primer should get you started, however, to find the best rice for your family’s personal tastes.

We are going to devote the month of march to Rice, with many great recipes and some fact finding articles.  Hope you enjoy it!  Here’s a cool recipe:

 Italian Antipasto Rice Pot

  •  1 1/2 cup water
  • 1/2 cup tomato juice
  • 1 cup uncooked rice
  • 1 tsp dried basil
  • 1 tsp dried oregano
  • 1/2 tsp kosher salt
  • 1 can (14 oz) artichoke hearts, drained and chopped
  • 1 jar (7 oz) roasted red peppers, drained and chopped
  • 1 can (2 oz) sliced ripe olives
  • 2 tsp fresh chopped parsley
  • 2 tsp fresh squeezed lemon juice
  • 1/2 tsp black pepper
  • 2 tsp grated Parmesan cheese

In a large saucepan, gently stir together the water, tomato juice, rice, basil, oregano, and salt. Put over medium-high heat, bring to a boil, then immediately turn heat down to low, cover pot, and simmer gently until rice is cooked – about 15 to 20 minutes depending on what rice you choose.

Remove pot from burner and add the artichokes, red peppers, olives, parsley, lemon juice, and black pepper. Cover pot and let sit for 3 or 4 minutes to let heat through. Sprinkle the Parmesan cheese over the top and serve immediately.

Will serve 6 as a side dish or 4 as a main dish.

You can add some thinly sliced hard salami if you wish to more closely resemble an antipasto platter.

CLICK HERE for Gracie's Complete Collection in the Italian Living Series
CLICK HERE for Gracie’s Complete Collection in the Italian Living Series
Enhanced by Zemanta

Grandma’s Home Made Pizza

For years I been searching for my Grandmother’s Home Made Pizza Recipe, but to no avail.  I have learned however, that life is sometimes just a bunch of coincidences thrown in together.  Check this one out!

Last week at the age of 96, my Aunt passed away.  The last in a long line of aunts and uncles that provided me and my cousins with nothing more than good memories and fantastic traditions.  After the funeral I’m driving my older cousin Frankie home.  The conversation, as it usually does, turned to food.

Now Frankie is probably the most unlikely person in my family to hold onto a recipe.  In fact I would be shocked if he even knows how to boil water.  Anyway, out of the blue he starts talking about grandma’s pizza.  I’m in shock how he tells everyone in the car that Grandma always made it for him on his birthday.  “A simple recipe,” he tells me, “thin crust, lightly covered with gravy (all my family calls sauce gravy), Mozzarella and Ricotta Cheeses, topped with basil.”

Now I’m really getting excited and I ask, cutting him off in mid sentence “The dough?  How did she make the dough, it was special,” I scream.  “Can’t help you there Cuz, I just know it sat in the fridge for a day.”  OK, so I’m on to a hot lead with Grandmas Pizza, but unfortunately the older generation has all passed on and I’m the one who is accountable for all the recipes.

The very next day I come home and there is a Martha Steward Living magazine in the mailbox.  Weird I think, as we don’t even subscribe.  In the lower right corner of the cover a headline reads “PIZZA: DELICIOUS TOPPINGS, AMAZING CRUST.”  I tear open to page 90 and there is a recipe for a long, slow rising dough, that I swear came from heaven.  If this isn’t the secret dough that I been searching for, it is certainly a very close second.

The following is the Basic Pizza Dough recipe as given in Martha Steward Living magazine.  For the toppings you can come up with your own, but I’m showing you how I remember it, many years ago.  Like to receive the magazine, Click Here (not an affiliate link, I’m just excited to find this Dough recipe).

Basic Pizza Dough

  • 4 cups unbleached bread flour, plus more for dusting
  • 1 1/2 tsp. instant dry yeast  (preferably SAF-instant)
  • 1 3/4 cups filtered or bottled water at room temperature
  • 2 1/4 tsp coarse salt
  • 1 Tbsp extra-virgin olive oil, plus more for brushing and bowl

In a large bowl whisk together flour and yeast.  Slowly add water, mixing with a wooden spoon until incorporated.  Stir in salt and oil.  Expect the dough to be lumpy and raggedy.  Brush with oil, cover bowl with a dry kitchen towel and let rest for 1 hour.

Turn out dough onto a floured surface and pat with flour.  Martha suggest you flour your hands while you work.  Holding two opposite sides, pull the dough until about one foot long, then fold back onto itself and pinch ends.  Repeat 4 more times, rotating dough each time to stretch alternate sides.  The dough should begin to feel smooth.

Place dough in a well-oiled large bowl, brush with oil and let rise in the fridge until doubled in size.  Should stay in the fridge 24 hours and up to 48 hours.  AKA – Cousin Frankie’s hot lead.

Turn dough onto a floured surface and cut into three (3) equal parts.  Form into balls, brush with oil, cover and let sit another hour.

Place dough on fist and use your knuckles to begin stretching dough from the middle, rotating it slightly as you work.  I can see my grandmother doing this like it was yesterday.  Set on surface and continue to stretch from all sides to form a rough 10 by 14 inch rectangle.  (Hey, I’m a traditionalist and always form a circle, as shown above).

Transfer dough to a lightly oiled 9 by 13 inch rimmed baking sheet, pulling the edges to fill the pan.

Pizza I cooked.

Stock photo, but you get the idea.  Should be thinner.

At this point the rest is up to you.  Use your favorite toppings, make three different pizzas, or go with Grandma’s trusted family favorite.  She would start by putting a thin coating of gravy (there’s that family thing again) you can top with very thin slices of tomatoes.  Next came the cheeses, shredded Mozzarella, droplets of fresh Ricotta and a sprinkle of grated Parmesan.

Place your Pizza in a preheated 475° oven and cook until the crust is golden brown and crispy.  Usually anywhere between 15 an 18 minutes.  Remove form the oven and sprinkle fresh chopped basil over the top. Cousin Frankie also tells me that from time to time she would add sauté onions to the mix.  I, of course add chopped garlic or garlic powder as well.

There you have it, the perfect Pizza for a Friday night or any night!


Enhanced by Zemanta

6 Food Aphrodisiacs to Enjoy This Valentine’s Day

An aphrodisiac is a substance that increases sexual desire.  From Greek: pertaining to Aphrodite, the Goddess of Love.  From Webster’s: something (such as a food, drink, or drug) that causes or increases sexual desire.

OK, with all that being said, what are the foods that are commonly referred to an an aphrodisiac?  Truth of the matter is, there are many, but we have our top six, a few wine suggestions and a Gracie’s recipe using one of our chosen foods.

#1 – Figs More so for their role in history and the belief that an open fig emulates the female sex organ.  It has never been proven that figs increase sexual desire, but let us not forget the mention in the bible of Adam and Eve wearing fig leaves to cover their private parts.  The ancient Greeks held them as sacred, associating them with love.  Figs were also Cleopatra’s favorite fruit.

#2 – Oysters Most people when asked to identify an aphrodisiac will pick oysters, due to its reputation for increasing sexual desire.  What really happens with oysters is that they are high in zinc which helps increase libido and produce sperm.  Interesting stuff, huh.

#3 – Avocado I read a whole lot of “Top Aphrodisiac” stories and post in preparing this little piece and avocados, along with oysters and figs were the only three foods to appear in every article.  From what I can tell the word avocado has its roots in ancient Aztec civilization and translates to testicle.

#4 Almonds Another one that seemed to pop up on  nearly everyone’s list, as almonds are high in vitamin E, magnesium and fiber.  Legend has it that the aroma of almonds is said to arouse passion in females.

 #5 ChocolateIt is no wonder that chocolate is a huge Valentine’s Day gift, when you consider that it contains a multitude of compounds that are natural aphrodisiacs.  Anandamide, a chemical that is said to make people feel good and phenylethylamine (PEA) which releases dopamine in the brain and peaks during organism.  PEA is often referred to as the “Love Chemical.”  Go with dark chocolate, as it is said to promote relaxation.

#6 Artichokes – Not on a bunch or top aphrodisiac list, but it did make Yahoo’s and I love artichokes (see Gracie’s Artichoke recipe is below).  According to Yahoo and Greek mythology,when Zeus was visiting his bro Poseidon, he spied a lovely lass, Cynara, whom he scooped up and took to Olympus for godly trysts whenever his wife was away. But when Cynara grew homesick and tried to escape to the world of mortals, Zeus, incensed, transformed her into an artichoke.”

We could go on forever and coming up with a top six was no easy chore.  Do an internet search for aphrodisiacs and you will be amazed and amused at the long list of foods that are said to help spice up everyone’s mood.

♥♥♥♥♥♥

 OK, so what wine do we suggest for Valentine’s Day?  I’m picking two Italian wines, a sparkling white and an Italian red, that is our favored wine for February.

 Adami Prosecco di Valdobbiadene BrutBosco di Gica $19.99 Adami’s NV Prosecco Superiore Bosco di Gica emerges from the glass with mineral-infused white fruit, smoke and crushed rocks in an intense, serious style of Prosecco I find appealing. This is Lot 36 0. Anticipated maturity: 2010-2012. “  91 PointsVinous / Antonio Galloni – CLICK HERE!

Zenato Amarone 2008 $66.99 (Hey it’s Valentine’s Day) – “Zenato is a reliable producer of quality Amarone, producing wines that always show personality and intensity. This delivers bold fruit and background tones of polished leather and dry tobacco. The mouthful is very bold and thick, boasting a playful touch of sweet spice.” 92 Points Wine Enthusiast – CLICK HERE!

♥♥♥♥♥♥

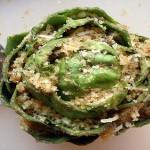
  Gracie’s Stuffed ArtichokesFrom “7 Days of Italian Cooking”

Ingredients:                           Stuffed Artichoke   

  • 4 medium artichokes
  • 1  cup extra virgin olive oil (more if needed)
  • 1/2 cup fresh Italian parsley
  • 2 or 3 chopped cloves of garlic
  • 2 1/2 cups of  seasoned Italian breadcrumbs
  • 1/2 cup grated Parmesan cheese
  • 1/2 tsp. dried oregano
  •  salt and pepper to taste

Take each artichoke and cut off the stem, so the base is flat.  Remove the bottom most leaves and trim with a kitchen scissors the remaining, easy to get leaves.  Cut off the top 1/2 inch of the artichoke.  Wash the artichokes in cold water and spread open so they can accept the stuffing.  Combine all your stuffing ingredients in a bowl and mix with the olive oil until you get a good consistency.  With a spoon fill the center of the artichokes with the filling and spread some around the leaves. 

Steam the stuffed artichokes by standing them on their base in about 2 inches of water in a pot and cover.  Steam for about 30 minutes but check to make sure the leaves pull away easily from the artichoke.  I always liked to put a little of the stuffing on the leaf as I ate the meaty end of the artichoke leaf. Sprinkle a bit of grated Parmesan over the top.

Enhanced by Zemanta
photo by: joyosity

5 Of The Healthiest Fruits And Vegetables

Fruits and vegetables are at the cornerstone of the Mediterranean Diet.  Listed below are 5 of the healthiest and what makes them so important.

“We are what we eat”, or so the saying goes. Different foods help our bodies to grow, to heal, and to keep the immune system running properly. More than that, they stop our bodies from falling apart and slow down the aging process

The absence of many different nutrients can lead to various physical ailments. It’s really important to eat healthily, so let’s look at five of the best fruits and vegetables to include in your Mediterranean Diet plan.

broccoliBroccoli: Green vegetables are widely considered among the healthiest foods we can eat, and broccoli is definitely one of the most nutrient-rich green vegetables. It’s a great source of vitamins C and K, as well as folate (a natural source of vitamin B9), vitamin B and fiber. In addition, it contains potassium, vitamins B1, B2, B3, B5 and B6, protein and calcium.

Broccoli can assist in lowering cholesterol levels which improves cardiovascular health. It supports the body’s detoxification system, aids vitamin D uptake and may also reduce our susceptibility to certain allergies.

BlueberriesBlueberries: Blueberries have a low glycemic index (GI) which means they have a low impact on our blood sugar levels., so you won’t get a sugar rush from eating blueberries. Eating foods with a low glycemic index is also believed to reduce the risk of developing type-II diabetes as well as coronary heart disease.

Blueberries are also a very rich source of antioxidants, which are thought to help reduce the risk of developing cancer. They are a good source of vitamin K, manganese and vitamin C too, placing them high on the nutrient-density scale.

SpinachSpinach: Spinach is one of the best green vegetables for your health. It contains a huge quantity of nutrients, and offers several specific health benefits.  Among the most concentrated nutrients are magnesium, folate, iron, potassium, calcium, vitamin E, protein and zinc.

Spinach may help reduce the risk of developing aggressive prostate cancer. It’s also an anti-inflammatory, meaning it may help reduce our susceptibility to allergies. The vitamin K, magnesium and calcium content of spinach is good for maintaining healthy bones and there are also antioxidants in spinach that help remove harmful free radicals from the body.

peasPeas: Green peas are another fantastic source of nutrients. They contain a huge range of nutrients in high quantities, including manganese, fiber, vitamin K and C, phosphorus, protein, copper, iron and zinc.

Peas can help to regulate blood sugar levels thanks to their fiber and protein content. Fiber and protein slow down the pace of digestion, which also means that carbohydrates are digested more slowly too. Peas are also known to reduce the chance of developing cardiovascular disease and to help protect against stomach cancer.

Red appleApples: Apples are a fantastic source of fiber which helps promote a healthy digestive system. This also aids in the regulation of blood sugar levels. They are also a great source of vitamin C. Although apples aren’t as nutrient-rich as some other fruits and vegetables, they are thought to have both anti-cancer and anti-asthma properties. In addition, they’re good for cardiovascular health.

Enhanced by Zemanta
photo by: wanko

Baked Spaghetti with Pepperoni


If you been following this blog for any length of time now you know we’re looking for some different ideas on Pasta dishes for our next EBook.  This Baked Spaghetti with Pepperoni recipe just came in and looks like a winner!

LZ98_001_0010_11DM  Our next Amazon Kindle  EBook is still in the works but should be out just around the time that the tulips and daffodils start to bloom.  Then again, with all this Polar Vortex weather we been getting, it will be a wonder if anything survived this winter.

Remember, the fist 10 recipes we receive will be included in the EBook and all ten contributors will receive a bottle of Sicilian Olive Oil.  We have received 4 to date!

Here’s our latest entry – Baked Spaghetti with Pepperoni:

Ingredients:

  • 1 medium onion, chopped
  •  1 lb ground chuck
  • 1 small green pepper, chopped
  • 1 (4 oz) can mushrooms, drained
  • 1 (26 oz) jar pasta sauce
  • 1 (8 oz) can tomato sauce
  • 1 t Italian seasoning
  • 1 lb spaghetti, broken into small pieces
  • 3/4 C milk
  • 2 eggs, slightly beaten
  • 1 (5 oz) pkg sliced pepperoni
  • 1 1/2 C shredded Cheddar cheese
  • 2 C shredded Monterey Jack cheese

Preparation:

  • Place a large pot of water over high heat.
  • Bring to a rapid boil.
  • Boil spaghetti until al denté.
  • Drain and rinse.
  • Place ground chuck in a large skillet over medium high heat.
  • Add the onion, green pepper and mushrooms.
  • Cook until meat is browned being sure to crumble the meat.
  • Drain.
  • Add the pasta sauce, tomato sauce and Italian seasoning.
  • Stir until well combined.
  • Simmer for 15 minutes.
  • Place the eggs and milk in a large bowl and blend.
  • Place the spaghetti in the egg mixture and toss to cover.
  • Lightly spray a large baking dish with a non stick cooking spray.
  • Place half of the spaghetti mixture into the bottom of the pan.
  • Place half of the meat sauce over the top of the spaghetti.
  • Repeat for another layer.
  • Preheat oven to 350 degrees.
  • Cover the casserole with aluminum foil.
  • Bake 45 minutes.
  • Uncover and top the casserole with the pepperoni and 2 cheeses.
  • Continue to bake another 15 minutes or until cheese has completely melted.

My Tip: Is it just me or is this dish calling for some fresh Ricotta cheese?  I would add the Ricotta when I add the spaghetti to the egg mixture.  About a cup sounds about right!

This recipe came to us from our friends at Yummyplr.com.  If you have a food blog or website and sometimes need content, do yourself a favor and check them out.  Click Here for instant access!

OH,  By the way.  The image at the top of the page is one of six finalist for our Spaghetti Book Cover.  The next five post will feature the other finalist.  I would really appreciate your input.  You can see all six at out FaceBook Fan page and vote there as well.

CLICK HERE


The Gracie’s Italian Living Series is now available as a complete set.  The First Three Books in the series are:

7 Days of Italian Cooking – Gracie’s Guide to Everyday Meals

Gracie’s Christmas Eve Recipe Book – Night of the 7 Fishes

The Mediterranean Diet Recipe Book – Gracie’s guide to Healthy Meals

CLICK HERE


Enhanced by Zemanta

5 Kitchen Staples to Help Save Money

I often wonder how my mom (Gracie) always seemed to have food on the table even in lean times? When visiting the grocery store every week to the tune of hundreds of dollars, I wish to know her secret. Then again, maybe it wasn’t a secret at all. Maybe it was just good planning and preparation on her part.  

LZ98_001_0024_11DM Let’s consider the fact that items that we have on hand are what determine how far our food will go. Filling your cabinets or pantry with a few useful staples can be the difference between one trip to the grocery store each week as opposed to three or four times due to poor planning.  Stocking just a few choice items is all you need to create wonderful meals and by taking this approach I’m sure you will save some money.

Flour. Flour is a starter item for many recipes. You can add it to some water and make gravy in the pan for many meat dishes. Flour is used to make bread (biscuits, rolls, loaves) and to coat chicken. It can also be used to coat a round or square cake pan to prevent the cake from sticking. Of course, one of the favorite uses for flour is in cookie recipes that make scrumptious desserts.

My college daughter was home for the holidays and loves to bake.  We always have a bag of flour on hand but with our budding baker around it just was not enough.  Buy extra flour and keep it in the fridge.

Rice. I love rice so much that I once bought a fifty pound bag from a grocery store. Fifty pounds, that’s a lot of rice! Rice is a side dish, but it doesn’t have to be plain. It can be jazzed up with veggies to accompany dinner. Gracie used leftover rice for a dessert called sweet rice. Just add evaporated milk and some sugar to a bowl of rice and warm it in the microwave. It is a tasty treat for after dinner. Another popular dessert is rice pudding.

Rice can also be mixed with leftover meat and a cream soup to form a casserole. Rice has many uses and your sure to find a few that your family will love.  A few weeks back we did a post on Sicilian Rice Croquettes.  Mom would often make those croquettes with leftover rice from a dish she prepared the night before.

LZ98_001_0010_11DM Pasta. I don’t have to go into the many different uses and recipes on can come up when cooking with pasta.  In fact our next EBook in the Italian Living Series is all about pasta.  You got a pound of pasta in the cupboard, you got dinner for the family. When cooking with pasta try thinking outside the tomato sauce box a little. Macaroni can be used to make a creamy salad while spiral pasta is used in many different pasta salads.  Spaghetti can be used in a casserole topped with cheese or with a lite pesto topping.

Spices. Every Kitchen had a spice rack and enough spices to create unique taste to ordinary meals.  There are other ways to season food besides salt and pepper. In fact, many spices taste better than salt. Even diehard salt-a-holics won’t miss the salt in foods if other seasonings are used. Cayenne pepper, chili powder, nutmeg, cinnamon, oregano, and garlic powder are all useful tools in your flavor arsenal to give foods a fresh new taste.

Beans. There go those beans again. Beans can top your salad (edamame), make an awesome dip (black beans), and go well with grilled foods (baked beans). They provide a good source of protein with very little fat. Beans are good in soups, stews, and over rice for a simple yet filling meal.

I can open my pantry right now and find four or five cans of different beans and believe me we go through them.  I can also find a few bags of dried beans which are far superior to the can version, just a bit more work.  My go to meal on Tuesday seems to be steamed salmon and a vegetable of choice.  I usually drum up a balsamic dressing and add some red kidney beans.  Dinner in twelve minutes, no joke!

So, do you have these staples in your kitchen? I bet you can probably think of several more that will enhance your pantry and save money. Start with these and grow your own list of basic kitchen staples that are versatile and economical.

Gracie’s Super Bowl Chili.

The big game is coming up and it provides an excellent opportunity to use some (or many) of the stables we mentioned and I’m sure a few of your own in a Super Chili.  Here’s one of my favorite ways to do chili.

  • 1/4 lb each of the following beans; kidney, red pinto, cranberry and navy
  • 1 lb bacon
  • 5 lg onions, peeled and chopped
  • 2/3 c garlic, minced
  • 1/4 c coriander seeds, toasted and ground
  • 1/4 c  cinnamon
  • 1/4 c paprika
  • 1/4 c cayenne pepper (or) to taste for the timid tongue
  • 1/2 c poblano chili peppers dried and ground
  • 1 can 108 oz Italian tomatoes with juice
  • 12 oz beer
  • 5 lb lean beef, ground
  • salt and pepper to taste

Pick over and wash beans. Put in large pot and cover with 4 qts.cold water. Soak over night. Wash and drain. Cover with water, bring to a bowl over high heat, lower heat and simmer for 2 hours or until tender.

Cook bacon in a large skillet, drain and crumble. Put next 7 ingredients in skillet and saute for 5 minutes. Add tomatoes and beer, simmer. In another skillet saute ground beef until no longer pink.

When beans are tender drain, reserving liquid. Add meat, bacon and vegetables to beans. Simmer over low heat until hot, adding bean liquid if necessary.  Season to taste with salt and pepper.

Want more of Gracie’s Secret recipes?  Click the ad below for her “7 Days of Italian Cooking – Gracie’s Guide to Everyday Meals.”


5 Ways to Make Great Cannelloni

I got a thing for Cannelloni these days and offer up 5 ways to stuff and prepare this sometimes overlooked Italian Specialty.

Roasted squash, spinach and tofu ricotta cannelloni

So just when I though for the first time in my life that I had enough food and needed to do some serious detox, along comes this desire to dive into a healthy dose of cannelloni.  Throughout the years I have come up with some shortcuts that will help cut time and aggravation when preparing this dish.  I also have a few killer stuffing.  Below are my 5 favorites, but first some history and housekeeping.

Cannelloni are a lot like Manicotti except a smaller, thinner and more suitable to a variety of fillings.  They are usually baked and some people actually think of them as tiny, rolled lasagna.  Beside Italy cannelloni is very popular in Uruguay and Argentina, due to a large Italian immigration to those countries.  They are often served with the Sunday meal.

Here’s Gracie’s basic ingredients/instructions for the dough:

  • 3 to 3 1/2 cups of unbleached flour
  • 1 tsp. salt
  • 4 eggs or if you like a little color, 3 eggs and 3 egg yolks, lightly beaten
  • Tbsp. water or more if needed

Now you can make the dough the old fashion way by forming a well with the flour and adding the eggs with a fork, gradually adding water as needed.  You can also take a short cut and buy ready made.

I never liked the well version and always find the store brought pasta sheets to thick for cannelloni.  What I do is pulse quickly the flour and salt in a food processor.  I then add the eggs and water as needed until everything comes together into a workable ball.  Take the ball and kneed on a lightly floured surface for about 10 minutes.  You will know when it’s ready.  Form two smaller balls and set aside until show time.

When ready to begin, break the two balls in half and pass the halves through the narrowest setting on a pasta making machine.  Fold in half and run through the machine again.  If needed you can repeat until you get the thickness desired.  When sheets are desired thickness cut into 4×4 pieces, cook in boiling water for about 3 minutes, dust some flour to keep from sticking and set aside until ready to make the cannelloni.

Extra hands help!

Extra hands help!

5 Fillings:

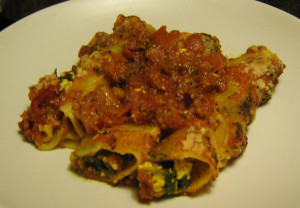
Filled - Julia's Jamie Oliver Spinach and Ricotta Cannelloni Spinach and Ricotta: Melt some butter in a saucepan and add 2 (10 ounce) packages of thawed frozen spinach for a few minutes.  Transfer to a large bowl, let cool and mix in two eggs a 1 1/2 cups of fresh Ricotta cheese.  Add salt and pepper to taste.  Gracie always added a little nutmeg to this mix as well.

Sausage and Mushroom – In a medium sized saucepan heat some olive oil and add two or three Italian Sausage with the castings removed. cook until golden brown and with a slotted spoon remove from the pan. Add chopped button mushrooms to the oil and cook until soft. Combine the sausage and mushrooms to a mixing with salt and pepper to taste. Mix well.

Sausage and Peppers – Cook the sausage as directed above.  Once done add chopped red and green peppers to the saucepan, along with a small yellow chopped onion.  Combine all the filling ingredients in a mixing bowl adding salt and pepper to taste.

Cannelloni mit Zucchini-Hack Meatball – This is an easy one.  Gracie would always have some meatballs in the house and she would heat then in some sauce, remove and chop them up to make a filling.  Be sure to add some sauce to the filling and at times she would add shredded Mozzarella cheese.

Crab Meat – Combine 3 cups of crab meat with a 1 cup of a Parmesan cream sauce, 2 Tbsp. of fresh chopped parsley, 2 Tbsp. of chopped fresh chives and 1 Tbsp. of lemon zest.  Add salt and pepper to taste.

To Make the Cannelloni:

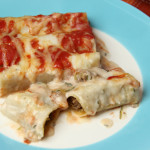
Divide the filling evenly over your 4×4 pasta squares.  Roll up and place seam side down on a lightly buttered baking dish.  You can even cover the bottom of the baking dish with sauce.  Add you sauce of choice over the top and bake at 450° for 15 minutes.

Julia's Jamie Oliver Spinach and Ricotta Cannelloni I have seen cannelloni baked in meat sauce, cream sauce, butter sauce, topped with pesto or just good old Sunday sauce.  I have even at times thrown shredded Mozzarella over the top before baking.  The possibilities are endless.

Super Tip: Cannelloni can be time consuming, but are well worth the effort in feeding a crowd.  If you’re having the gang over for the Big Game a tray of assorted Cannelloni can be a game winner!

 Want more of Gracie’s Secret recipes? CLICK HERE For “7 Days of Italian Cooking – Gracie’s Guide to Everyday Meals.”

Potato Pie – A Recipe For Busy People

cropped-cropped-DMO_014211.jpg  My Mom’s Sicilian Potato Pie for Busy People

When I was a kid growing up in the late 50s and early 60s, my mom held down a full time job.  This was a little unusual at the time as working mothers was sort of a new breed.  In addition to her 40 hours a week job and tending to a family, she also cared for an aging mother who lived downstairs from us.

Mom had a full plate, yet never complained and believe it or not never failed to have a quality dinner on our table.  She always planned ahead and prepared many dishes, sauces and cooking stocks on the weekend to use during the week.

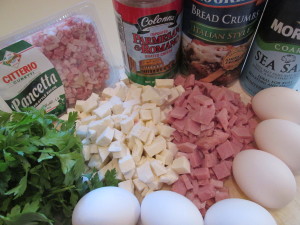
The Supporting Cast in Gracie's Sicilian Potato Pie

The Supporting Cast in Gracie’s Sicilian Potato Pie

I know I spend a lot of time here talking about the health benefits of the Mediterranean Diet and how my mom’s cooking reflected that style many years ago.  This recipe is a bit of a diversion, as its loaded down with eggs, cheese, and ham.  Consider making this on your cheat night!

Below is a recipe we enjoyed weekly and can come in handy when you are in a pinch for a quick meal.  From “7 Days of Italian Cooking – Gracie’s Guide to Everyday Meals”

 Potato Pie

I had almost totally forgotten about this dish till I went looking through my mom’s old recipes book.  This was one meal I think she took real enjoyment in making.  Not a lot of prep time needed and everyone, even my picky sister enjoyed Mom’s Potato Pie.

  • 2 lbs. Potatoes                                                
  • 4 tbs. grated Romano or Parmesan
  • ½ lb. shredded or cubed mozzarella                             
  • 2 tsp. chopped Italian parsley
  • 2 thick slices of ham                                      
  • ½ cup bread crumbs, chopped
  • 1 thick slice pancetta, chopped
  • salt and pepper to taste (I love Sea Salt)
  • 6 large eggs

 Clean potatoes and boil in salted water until tender, about 20 to 30 minutes.  Let the potatoes cool, peel and mash until smooth.  In a large bowl add the potatoes, the mozzarella, ham, pancetta, eggs, cheese, parsley, salt and pepper.  Mix well.

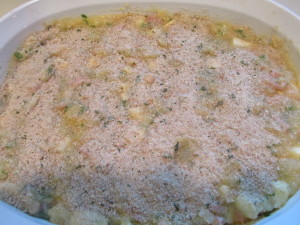
Ready for the Oven

Ready for the Oven

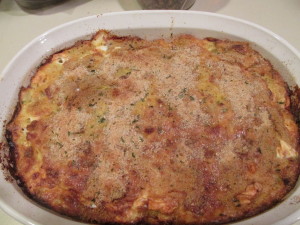
Butter an 8×8 baking dish and sprinkle bread crumbs to cover lightly the bottom of the dish.  Save some bread crumbs for the top.  Place potato mixture in the dish and now sprinkle the remaining bread crumbs over the top.  Bake in a preheated 375 degree oven until golden brown, about 40 minutes.

Finished Product

Finished Product

 I have a real picky eater at home and both my wife and I are busy with work.  This dish has bailed us out on all fronts many times.  I always think back to my mom and marvel had she managed to pull everything together.  I guess life was simpler back then.

 Enjoy!

Want more of Gracie’s Secret recipes?  Click the ad below for her “7 Days of Italian Cooking – Gracie’s Guide to Everyday Meals.”

Enhanced by Zemanta

Gracie’s Rice Balls – A New Year Treat

My Mom always started the New Year with a special appetizer to ring in the celebration. I remember the first time she made rice balls, I swore I wouldn’t like them.  Nothing could have been farther from the truth.

LZ98_001_0016_11DM  Unfortunately mom’s recipe for rice balls never seemed to have made it in print form.  As with many of her specialties she made them from memory.  Rice Balls or Arancine di Riso or as my mom called them Rice Croquettes have their origin in Sicily where they were often sold by street vendors.

My mom stuffed her croquettes with mozzarella cheese and loved putting these out on New Year’s Eve.   There was always a few family members that celebrated with us and of course someone was always looking for food.

When I had my Specialty Shop we use to stuff them with either mozzarella or sausage and peppers.  When visiting Sicily a few years back I saw the stuffed with peas, meat sauce or a cheese sauce.  Our croquettes were usually made in a traditional Sicilian manor, about two inches in diameter, but you can make them with just about any filling or size you want.  Ham, prosciutto and bacon are also common stuffing.

Here’s a recipe I found in “Enoteca, Simple, Delicious Recipes In The Italian Wine Bar Tradition.”  I made a few changes, but for the most part it’s author Joyce Goldstein’s creation.

Ingredients (makes 12 to 16 two inch croquettes):

  • 1 1/2 cups water
  • 1/2 teaspoon chopped saffron threads, steeped in 1/4 cup of hot water for 15 minutes
  • 1 tsp. salt or more to taste (I use sea salt)
  • 1 cup Arborio rice
  • 2 eggs
  • 6 tbsp. grated Parmesan Cheese
  • Freshly ground pepper to taste
  • 12 to 16 cubes of fresh Mozzarella Cheese
  • 1 tbsp. chopped fresh sage
  • 3/4 cup seasoned Italian breadcrumbs
  • Grape Seed oil for deep frying (my preference for deep frying)

Combine the water, saffron, and salt in s saucepan and bring to a boil over high heat.  Add the rice all at once, reduce the heat to low and cover the pan.  Simmer until the rice has absorbed all the water and cooked through but still sticky, about 20 minutes. Stir in eggs and Parmesan and season with salt and pepper.

 Click Here for Gracie’s Product Review

and the best Saucepan for making these Croquettes


Remove the pan from the heat and spoon the rice out onto a baking sheet, spreading it out evenly to cool it quickly.  Refrigerate till cold but not hard.

To make the Croquettes:

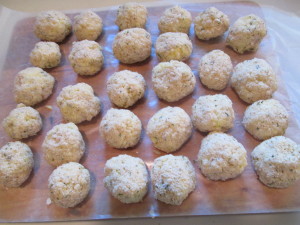
Roll the cheese cubes in the sage to coat evenly, and spread the breadcrumbs on a plate.  Take a spoonful of the rice into your hand and with your finger make an indentation into the rice.  Tuck a cheese cube into the indentation and smooth over with the rice making a round two inch ball.  Dip the balls into the breadcrumbs, making certain to cover them evenly.  Place the croquettes on a baking sheet lined with parchment paper.  Repeat until all the rice is used up and transfer to refrigerator until you are ready to fry them.  They can stay refrigerated for up to 24 hours.

Rice Croquettes ready for frying.

To Cook The Croquettes:

Pour the Grape seed oil to a dept of 3 inches into a deep saute pan and heat to 350.  Now I prefer Grape seed oil because it has a high smoke point making it a good choice for sautéing, stir frying or baking.

Read our earlier post on the Benefits of Grape Seed Oil.

Click Here

Add the Croquettes, a few at a time to the hot oil.  Getting the oil hot is key, otherwise the Croquettes will not cook properly and can break up.  Lift them out of the oil a few times with a slotted spoon so that the cheese will have time to melt in the center.  This is a great tip I learned form Goldstein’s book.

Continue to fry the rice balls for 6 to 7 minutes or until golden brown.  Remove with your slotted spoon and transfer to paper towels to drain.  You can keep them warm in the over while you cook he remaining croquettes. Serve them hot and I always have some tomato  sauce or Sunday Gravy to dip them into.

IMG_0006

Want more of Gracie’s Secret recipes?  Click the ad below for her “7 Days of Italian Cooking – Gracie’s Guide to Everyday Meals.”


Enhanced by Zemanta

The Christmas Tree Story and Gracie’s Baked Ziti

I love the tradition behind a live Christmas Tree as much as anyone, and my story is of a very special Christmas many years ago.


fpx122212-07  Every year it seems to be the same story.  My wife and I along with my son and daughter head over to the local firehouse to purchase our Christmas Tree.  The action begins the second we get into the car.  It starts with one of the kids claiming it’s their turn to pick out the tree.  An argument immediately erupts and this happy, jolly occasion turns into a “Why do we bother doing this each year” affair.

This year promised to be very much the same.  My daughter had returned home from her second year of college the night before and was excited to pick out the tree.  She reminded my son the it was her turn and he surprisingly agreed.  I had seen this ploy of his before  and knew his fight was not over.  He would shoot down every tree she picked out.

The following evening we take the short drive to the firehouse and begin the process of grabbing the perfect tree.  In the car they reach a pact and decide to make the trip fun.  I don’t believe this for one second, but my wife reminds me they are growing up and hopefully more mature.

I’m still not certain about this love affair the kids are having and wait for the fireworks to begin.  I walk over to a fireman friend in an attempt to stay away from the impending confrontation.  At this moment I cannot help but think back to a very early time in my life when the tradition of having a Christmas Tree in the house was put to the test due to a death in the family.

It was November of 1956 and I’m five years old.  My grandmother (my father’s mother) had passed away kind of unexpectedly.  I don’t remember the exact circumstances behind her passing but I clearly recall my father’s grief.  Returning home after the funeral, he announced that in keeping with tradition we (he) would need more time to grieve and that there would be no Christmas Tree or lights displayed on the house this year.

My sister and I did not know what to say.  The disappointment was clearly etched on our faces.   I remember my mom pulling him aside and trying to convince him to let us have a normal Christmas but my father remained firm in his decision.  As the days marched quickly to the holiday and our friends were continuously talking up Santa and Christmas my sister and I now became fearful that even Mr. Claus would not stop at a house without a Christmas Tree.  Our Christmas love was fading.

Back then my father owned a tiny stationary store and employed a local kid from the neighborhood.  Harold was 19 years old at the time and getting ready to join the armed services.  My sister and I regarded him as an older brother and my parents treated him like one of the family.  Harold would spend nearly every Sunday with us and loved  my mom’s cooking.

My father, still shaken by my grandmother’s passing, had Harold close the store on many evenings.  A few days before Christmas he stopped by the house after his evening shift to  give my father the keys.  Christmas was definitely in the air as a light December Snow had settled onto the streets and sidewalks of the neighbor.  He walked into the house handed my father the keys and asked. “Hey Pat, why no tree, and where are the lights?”

The silence that filled the room was upsetting.  “Why don’t you let me take the kids out and pick up a tree and when I come back I’ll get the lights up?  Really Pat, it’s Christmas for goodness sake.”  I didn’t know what to expect, but for the first time in  many weeks, I saw my father crack a half smile. He reached into his pocket for a few bills, passed them on to Harold and said, “Sounds like a good idea kid, why don’t you do that.”

My sister and I had our coats, hats and gloves on in a split second and raced to the garage for one of our sleights.  We meet Harold in the front yard and began to sing Christmas Carols as we made our way the few blocks to a spot where they were selling trees.  We only hoped that there would be a good one left.

Word had spread quickly in the neighborhood the weeks before about my dads refusal to get a tree and word spread even quicker that we were finally going tree shopping.  A few friends and cousins meet up with us and our Christmas Tree trip turned into a posse of kids and carolers celebrating the season.  Before we left the house my mom had pulled Harold aside and asked if he was hungry and assured him she would get started on making his favorite, a Baked Ziti (Recipe below).

The trip felt like it took forever and I worried that a good tree would still be available.  We arrived at the lot just as the snow ended and a bright winter sky filled with stars pointed my sister and I to the tree we wanted.  We returned home, just as the Baked Ziti was coming out of the oven.

Harold and my father went to work on the lights while we decorated the tree.  What hours before was only a wish shared with a bedtime prayer, now transformed our home into the visible wonders of the Christmas Season. The joy we all showed also seem to transform my dad, filling him with a holiday spirit that would stay with him the rest of his life.

Filled with this memory, I became distracted and barely noticed my wife and kids at the register, squaring up their tree purchase.  “Come on dad we’re set to go.  What do you think of this one'”  as they held the tree up for my inspection.  “Wait a second” I said “we’ve only been here a minute.  Where’s the fight, the argument, you’re breaking tradition.”  “We both love this one and besides its time to start a new tradition of making this trip fun with pleasant memories,” said my mature daughter.

Almost on cue a light snow began to fall through the still bright December sky.  My wife sharing my surprise with the kids, said “Looks like this could be a good Christmas.” “Christmas is always good” I replied.

Gracie’s Baked Ziti: 

Baked Ziti

Baked Ziti Ingredients:

  • 2 cups ricotta cheese
  • 1/2 pound mozzarella cheese, shredded
  • 3/4 cup grated Parmesan cheese
  • 2 tablespoons chopped fresh parsley
  • 1/2 teaspoon salt
  • 1/2 teaspoon pepper
  • 2 large eggs, lightly beaten
  • 1 pound Ziti pasta
  • 2 cups of Sauce (more if needed)

Preparation:

 1.    In a large bowl combine the ricotta cheese, Parmesan cheese, parsley, salt, pepper, eggs and 3/4 of the mozzarella cheese.

 2.    Preheat the oven to 350 degrees and start boiling 4 cups of salted water.  Add the pasta and cook until not quite al dente.

 3.    Drain the past and return to the pot.  Combine drained pasta with the ricotta cheese mix and 1 cups of sauce.  Mix all well.

 4.    Cover the bottom of a good size casserole dish with some of the remaining sauce and layer the pasta into the dish.  Add the remaining sauce evenly and top with shredded mozzarella.

 5.    Bake for 20 minutes or until the Mozzarella is melted and lightly browned.  Let sit for 5 minutes before serving.

Gracie’s Tip – Go out of your way to find fresh Ricotta Cheese.  Any Italian Market will be sure to carry fresh Ricotta.

Happy Holidays Everyone!


Enhanced by Zemanta
photos by: & robot-girl