Christmas Eve – Night of the 7 Fishes

The Thanksgiving plates were no sooner off the table when mom began thinking about Christmas and the family’s Christmas Eve celebration, which always featured 7 fish dishes.

The following is a excerpt from my most popular eBook – Gracie’s Christmas Eve Recipe Book – Night of the 7 Fishes.  Many of you own a copy, but if you don’t it’s yours FREE this month just by subscribing to this site.  The sign up form is located in the top right side bar.

From Gracie’s Christmas Eve Recipe Book – Night of the 7 Fishes

“As a child I never did understand why we had to eat fish on Christmas Eve and why there had to be seven different kinds.  I was not a big fish fan as a kid and most of my cousins felt the same way.  As the entire family gathered to celebrate we often made faces as Baccala and Mussels and Tilapia fillets adorned the table.  We put up with this mainly because it was Christmas Eve and we didn’t want to upset the adults.

As we got older the tradition took on a new significance, especially since we learned to appreciate the many fish offerings our parents put before us.

Don’t want to subscribe, but still want a copy of the eBook.

CLICK HERE – Available at Amazon for $2.99


I did some research into the Seafood/Christmas Eve connection and came up with some reasoning behind the tradition.  First off; the fish only on Christmas Eve is a custom mainly in the southern part of Italy and especially in Sicily.  Northern Italians rarely celebrated the Eve in this fashion

The fish only deal has more to do with politics than with preference.  Like the old ritual of meatless Fridays, the reasoning is pretty much the same.  You see sometime in the early centuries of Catholicism, pressure was placed on the Vatican to recognize the plight of fishermen and the significance they played in the new testament.  In order to provide an economic lift to this industry, one day a week (Friday) was set aside to abstain from meat.  Translation, eat fish.  That same pressure was later added to Christmas Eve.

Another school of thought has it that since Christmas Eve is the evening before a holy day, abstaining from meat is expected.  Again, very big in the Southern part of Italy where, you guessed it, fishing was and still is a huge industry.

So why 7 fishes and not 5 or 9 or 11.  Indeed many regions do celebrate with different numbers but 7 is the most common.  Reasons vary from 7 days in the week, to 7 days of creation to the 7 sacraments.  Whatever the reason, Christmas Eve for many Italians is indeed special and enjoyed by eating fish.

LZ98_001_0038_11DMWithGracie’s Christmas Eve Recipe Book – Night of  the Seven Fishes ,” we share with you some fantastic seafood selections, that are good not only on the holiday but year round. We also talk about some wonderful memories of how we made the Night of Seven Fishes special.”

Here’s a recipe that didn’t make the book.  Buon Appitito!

Lemon Garlic Marinated Shrimp:

Gracie loved shrimp and when she took the reigns at Christmas Eve you could bet there was at least 2 shrimp dishes.  She would have loved this one from www.eatingwell.com.

Ingredients

  • 3 tablespoons minced garlic
  • 2 tablespoons extra-virgin olive oil
  • 1/4 cup lemon juice
  • 1/4 cup minced fresh parsley
  • 1/2 teaspoon kosher salt
  • 1/2 teaspoon pepper
  • 1 1/4 pounds cooked shrimp

Preparation

  1. Place garlic and oil in a small skillet and cook over medium heat until fragrant, about 1 minute. Add lemon juice, parsley, salt and pepper. Toss with shrimp in a large bowl. Chill until ready to serve.

Tips & Notes

  • Make Ahead Tip: Cover and refrigerate for up to 2 hours.
WINE PAIRING FOR CHRISTMAS EVE:
Even with all the seafood on Christmas Eve I stick with Reds.  I prefer a smooth Pinot Noir to start the evening, usually with the shrimp dish.  As we move into more complicated offering that may have a rich sauce, I take out the big guns and opt for a Brunello.  I always, in keeping with the motherland, have something from Sicily.  A Nero d’ Avola fits the bill
Enhanced by Zemanta

Judy Rogers and the Zuni Cafe Roasted Chicken – A Tribute

“It was pretty clear, the food you eat every day is the most important food. This is what we do at Zuni.”

Judy Rogers

Judy Rogers, co owner and head chef at San Francisco famed Zuni Cafe, died at the age of 57,  earlier this week from complications associated with Appendix cancer.  If you never heard of Judy Rogers or were not fortunate enough to own a copy of her “Zuni Cafe Cookbook”  you have really missed out.

In the above quote Ms. Rogers is referring to her earliest influences while living with a family of renowned chefs in France as a 16 year old exchange student.  This chance occurrence started her on a career devoted to taste, cooking and the simple enjoyment of food.

Ms. Rogers’s cooking over years was renowned for its simple ingredients and the use of locally grown products.  Not considered a trend setter, but if you ask me this idea of simplicity, combined with a rustic local flavor is where the food industry seems to be at in recent years.  Take a look at the rise in community Farmers Markets.

Much of the influences and food styles that Ms. Rogers favored can be, in my opinion, considered Mediterranean or old school, old world cuisine.  Her signature dish Zuni Roasted Chicken with Bread Salad speaks directly to this style.

Her recipes and cook book will serve as a lasting tribute and her influence on American cuisine and the American Restaurant scene will forever be felt through her style which can be described as simplicity through precision.

Below is the recipe for Zuni Roasted Chicken, as seen in “The Smitten Kitchen” blog and adapted from the cookbook the Zuni Cafe, San Francisco .  Do yourself a favor and make this dish, along with the bread salad, as soon as possible.

Zuni Cafe’s Roasted Chicken:

  • One small chicken, 2 3/4 to 3 1/2-pounds
  • 4 tender sprigs fresh thyme
  • marjoram, rosemary or sage, about 1/2 inch long
  • 3/4 teaspoon salt
  • 3/4 to 1 teaspoon freshly cracked black pepper
  • A little water

Remove and discard the lump of fat inside the chicken. Rinse the chicken and pat very dry inside and out. Be thorough — a wet chicken will spend too much time steaming before it begins to turn golden brown.

Approaching from the edge of the cavity, slide a finger under the skin of each of the breasts, making 2 little pockets. Now use the tip of your finger to gently loosen a pocket of skin on the outside of the thickest section of each thigh. Using your finger, shove an herb sprig into each of the 4 pockets.

Season the chicken liberally all over with salt and pepper. Season the thick sections a little more heavily than the skinny ankles and wings. Sprinkle a little of the salt just inside the cavity, on the backbone, but don’t otherwise worry about seasoning the inside. Twist and tuck the wing tips behind the shoulders. Cover loosely and refrigerate.

Prepare your oven and pan: [Day of, total time is 45 minutes to 1 hour]

Preheat the oven to 475°F. Choose a shallow flameproof roasting pan or dish barely larger than the chicken, or use a 10-inch skillet with an all-metal handle (we used a 12-inch cast iron frying pan for a 3 1/2 pound chicken). Preheat the pan over medium heat. Wipe the chicken dry and set it breast side up in the pan. It should sizzle.

Roast the chicken: Place the chicken in the pan in the center of the oven and listen and watch for it to start browning within 20 minutes. If it doesn’t, raise the temperature progressively until it does. The skin should blister, but if the chicken begins to char, or the fat is smoking, reduce temperature by 25 degrees. After about 30 minutes, turn the bird over — drying the bird and preheating the pan should keep the skin from sticking. Roast for another 10 to 20 minutes, depending on size, then flip back over to recrisp the breast skin, another 5 to 10 minutes.

Rest the chicken: Remove the chicken from the oven and turn off the heat. Lift the chicken from the roasting pan and set on a plate. Carefully pour the clear fat from the roasting pan, leaving the lean drippings behind. Add about a tablespoon of water to the hot pan and swirl it.

Slash the stretched skin between the thighs and breasts of the chicken, then tilt the bird and plate over the roasting pan to drain the juice into the drippings. You can let it rest while you finish your side dishes (or Bread Salad, below). The meat will become more tender and uniformly succulent as it cools.

Serve the chicken: Set a platter in the oven to warm for a minute or two. Tilt the roasting pan and skim the last of the fat. Place over medium-low heat, add any juice that has collected under the chicken, and bring to a simmer. Stir and scrape to soften any hard golden drippings. Taste — the juices will be extremely flavorful.

Cut the chicken into pieces, spread on the warm platter (on top of the Bread Salad, if using).

    Zuni Cafe Bread Salad
Adapted from the Zuni Cafe, San Francisco

  • Generous 8 ounces slightly stale open-crumbed, chewy, peasant-style bread (not sourdough)
  • 6 to 8 tablespoons mild-tasting olive oil
  • 1 1/2 tablespoons Champagne vinegar or white wine vinegar
  • Salt and freshly cracked black pepper
  • 1 tablespoon dried currants plumped in 1 tablespoon red wine vinegar and 1 tablespoon warm water for ten minutes or so
  • 2 tablespoons pine nuts
  • 2 to 3 garlic cloves, slivered
  • 1/4 cup slivered scallions (about 4 scallions), including a little of the green part
  • 2 tablespoons lightly salted chicken stock or lightly salted water
  • A few handfuls of arugula, frisée, or red mustard greens, carefully washed and dried

Preheat the broiler. Carve off all of the bottom and most of the top and side crusts from your bread (you can reserve these to use as croutons for soup or another salad). Tear bread into irregular 2- to 3-inch chunks, wads, bite-sized bits and fat crumbs. You should get about 4 cups.

Toss them with just a tablespoon or two of olive oil, lightly coating them, and broil them very briefly, just to lightly color the edges. If you’d like to toast the pine nuts (recommended) you can put them on your broiler tray as well, but watch them very carefully — they cook quickly!

Combine about 1/4 cup of the olive oil with the Champagne or white wine vinegar and salt and pepper to taste. Toss about 1/4 cup of this tart vinaigrette with the torn bread in a wide salad bowl; the bread will be unevenly dressed. Taste one of the more saturated pieces. If it is bland, add a little salt and pepper and toss again.

Heat a spoonful of the olive oil in a small skillet, add the garlic and scallions, and cook over medium-low heat, stirring constantly, until softened. Don’t let them color. Scrape into the bread and fold to combine. Drain the plumped currants and fold them in, along with the pine nuts, if they were not already mixed with the bread scraps from the broiling step. Dribble the chicken stock or lightly salted water over the salad and fold again.

Taste a few pieces of bread — a fairly saturated one and a dryish one. If it is bland, add salt, pepper, and/or a few drops of vinegar, then toss well.

If you’re going to serve the salad under the roast chicken (recipe above), you can pile the bread salad on the serving dish you want to use and tent it with foil. If you want to serve it separately, do the same, but in a 1-quart shallow baking dish. Hang onto the bowl you mixed it in — you’ll use it again.

Place the salad in the oven after you flip the chicken the final time, for about 5 to 10 minutes.

Tip the bread salad back into the salad bowl. It will be steamy-hot, a mixture of soft, moist wads, crispy-on-the-outside-but-moist-in-the-middle-wads, and a few downright crispy ones. Drizzle and toss with a spoonful of the pan juices. Add the greens, a drizzle of vinaigrette, and fold well. Taste again.


Enhanced by Zemanta

Memories Of An Italian/American Thanksgiving

When it came to food the Thanksgiving celebration in our home was a little over the top.  Usually by the time we got to the turkey, everyone was ready for a nap.

This was not an unusual occurrence in most Italian America families.  Food, being of the utmost importance was certainly celebrated at Thanksgiving.  It was also a time when the Holiday traditions kicked off.

LZ98_001_0028_11DMFirst off, was my grandmothers kitchen table with the leafs added was moved to the living room, where it will stay through the New Years celebrations.  That table would get a workout, between the holiday celebrations, Sunday meals and many a family card game.

The fireplace which was rarely used, would see its first flame on Thanksgiving and remain a steady fixture until the Holidays ended.  Afterwards the flue would be closed till next year.  Grandpa didn’t like the heat going out the chimney.

The Friday after Thanksgiving the lights came out and the house at 7 Monroe Street took on a new look.  Truly a special time with special memories and the Thanksgiving meal kicked it all off.

Visit www.GraciesProductReview.com before you buy that new Turkey Roasting Pan and check out our top pick!

First thing to hit the table was my mom’s antipasto.  She labeled it “The Farmers Antipasto,” don’t ask me why, she just did.  Nothing fancy just basic stuff all thrown in together.

LZ98_001_0011_11DM The bottom of her platter was covered with Genoa Salami, sliced very thin.  Next came her three cheeses cut in chunks.  Parmigiana Reggiano (the good aged stuff), Sharp Provolone and aged Asiago.  On top of all this was jarred mushrooms, artichokes hearts and red roasted peppers.  Throw in all the juices from the jars, and add some black and green olives and you got the Gracie’s Farmers Antipasto.

See our tips for making the right Thanksgiving wine choice!

After the Antipasto it was soup time.  Usually something out of the ordinary and I distinctly remember a Pumpkin Soup gracing many a Thanksgiving meal. Soup dishes gone, it was Pasta time and at Thanksgiving there was no holding back.  Check out Gracie’s Stuffed Rigatoni recipe that appears in “7 Days Of Italian Cooking – Gracie’s Guide to Everyday Meals.”  This was indeed a meal unto its self and believe me we took a half time break after this dish.

The Filling:

  • 1 1/2 cups whole milk Ricotta cheese
  • 1/4 lb. shredded Mozzarella cheese
  • 1/2 lb. diced Panchetta
  • 1/2 cup grated Parmesan cheese
  • 1 beaten egg
  • 1/2 cup chopped Italian parsley
  • salt and pepper to taste 

Cook the Rigatoni in a pot of salted water until almost al dente.  Remember they are going into the oven to cook further.

Add all of your ingredients for the filling into a large bowl and mix well.  Remove the rigatoni from the water and drain.  My mom use to rinse the rigatoni in cold water, but I just try and let them cool down enough to work with

Carefully stuff each rigatoni with the mix and arrange in a casserole or baking dish.  I put a little gravy on the bottom and cover the top with more sauce.  Cook in a preheated 350 degree oven for 30 minutes.  Make sure the rigatoni does not dry out by adding sauce over the top if needed.

CHEFS Catalog Save $25 on Orders over $200 plus FREE Shipping

“Who’s ready for the Turkey,” my mom would ring out and most of the time everyone was too full to respond.  It didn’t matter, out come the turkey and stuffing, sweet potatoes, Italian style green beans, corn casserole, cranberries sauce and mashed potatoes.

We all did our best to get through that meal, but the leftovers lasted a week and I didn’t even begin to talk about the desserts.

I always said Thanksgiving is about the “F” words, Food, Family and Football.  I hope you all enjoy this great Holiday and wish you well for the remainder of the year!

Related articles

Enhanced by Zemanta

5 Tips for Finding the Right Thanksgiving Wine

Finding the right wine to serve with all those different foods on Thanksgiving is not as easy as you think.  Here are 5 tips to help you make the right selection!

LZ98_001_0028_11DM

Tip # 1 – Pick a Wine you Know and Like: 

With holidays and special occasions many of us try and find the right wine that pairs naturally with the food we’re about to eat.  Unfortunately at Thanksgiving this creates a bit of a challenge since there are so many different foods, taste and flavors.  My advice, is to stick with wines you know and love.  Take the guess work out of the wine choice and relax with a familiar favorite.

Tip # 2 – Avoid that Special Aged Wine:

If you are like me you probably have a special wine sitting in your basement cellar waiting for the right occasion to pop open.  Thanksgiving comes along, you bring the wine out, tout its greatness to your guest and bingo, it’s bad.  Either spoiled, beyond its peek or seepage has let to a disappointing taste.  Avoid this disaster by playing it safe, pick something with less age.

Tip # 3 – Don’t Go Overboard:

I know it’s Thanksgiving and we’re all happy to begin the Holiday season, but there is no reason to go overboard on your wine purchase.  I have been to Thanksgiving dinners where there was more choices than there were side dishes.  Chances are your guest enjoy wine, but may not be overly knowledgeable and will like whatever you put out.  Stick with one or two grape varieties and limit the number of producers.  I always have a couple bottles of Red Zinfandel by a producer I like and usually a California Pinot Noir.  Add a white  and I’m done.

Tip # 4 – Decant the Good Stuff:

OK, so you’re ignoring Tip # 2 and going with that special selection you been saving.  You’re confident the wine is good, there is no visible sign of seepage and you have taken extremely good care of this wine since the day you purchased it.  Go one step further and decant the wine at least two hours before you intend to use it.  An aged selection or a wine with a lot of structure needs to breathe before your enjoy.  This one tip alone will really improve the wine experience.

Tip # 5 – Go for Balance:

Like I said before, there are a lot of different taste, smells and flavors with the Thanksgiving meal and it takes a wine with good balance to stand up to this feast.  When making your purchase ask for a balanced wine.  You don’t want a wine that is overly fruity or very high in tannins.  You want the a smooth wine that does not compete with the food but compliments the food.  A good wine shop should be able to point you in the right direction.

I hope these tips help you wine experience not just with Thanksgiving but throughout the Holidays.  If you thought I was going to let you leave without making a suggestion or two, you haven’t been around this site for too long. The wines below are available at Wine.Com and will ship today if you order NOW!!

Bonus Tip: Use the Right Wine Glass, CLICK HERE!


Ravenswood Teldeschi Vineyard Zinfandel 2011

Winemaker’s Notes:

Teldeschi Zinfandel’s powerful aromas of black cherries, coffee, caramel, and vanilla as well as other sweet dark fruit scents, combine to create the classic character of a great Dry Creek Benchland Zinfandel. Rich flavors of sweet cherry liqueur, vanilla, and smoke lead to a ripe, dense, long, moderately astringent, and bright fruit finish.

This Zin gets high scores. expect to pay around $30,00.  Click Here to Buy Now!


Seghesio Sonoma Zinfandel 2012

Winemaker’s Notes:

Spicy, lush black fruit of Alexander Valley. Briary and raspberry flavors, along with structure, of cooler Dry Creek Valley. Balanced and elegantly structured.

Wine.Com has this at a bargain price of $19.99.  Click Here to Buy Now!


Spellbound Petite Sirah 2012

  • Winemaker’s Notes:

    Intensity of color, rich black and brambly fruits, vanilla bean and roasting coffee aromatics are complemented by remarkable approachability in our Spellbound Petite Sirah. The wine is crafted to unleash dark and luscious characteristics, while managing tannins to deliver an opulent and juicy Petite Sirah. This lush yet easy-drinking wine provides intense berry character, with superb texture you will find in none other than Spellbound Petite Sirah.

  • I love a good Petite Sirah and this bargain from Wine.com is worth twice the price.  Buy Now For $12.99 by Clicking Here!


    20% off Sitewide at WineTasting.com!  Use coupon code SIPME (Offer valid thru 12/31/13)

    Enhanced by Zemanta

    Potato Croquettes Stuffed With Goat Cheese

    My mom would make Potato Croquettes whenever she needed to fill out a meal.  We sometimes had then 2 or 3 times in a week.  It didn’t matter – they were so good my sister and I would fight over them.

    LZ98_001_0029_11DM

    It was Restaurant Week in my home town earlier this month and my wife and I decided to take advantage and try a new Mediterranean place that people had been buzzing about.  It was a pretty cool deal, for $30.00 you got an appetizer, a main course and your choice of dessert.

    When I first glanced at the menu I saw Potato Croquettes with goat cheese as an appetizer choice.  I started telling my wife how Gracie would make them all the time, and how my sister and I would polish off whatever she put out.  Of course she knew this, as I tend to tell stories over and over again.  Hmm, maybe that’s why I like blogging.

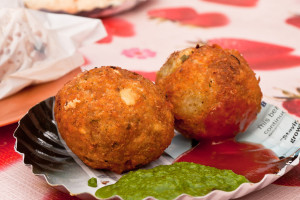
    Potato croquettes

    So my obvious choice for an appetizer was the Potato Croquettes served over melted goat cheese.  The combination was truly amazing and when my wife asked for a taste, it brought me back to how my mom used to make me share, against my will, with my sister.

    So that evening I came home and searched the internet to see if I could find a recipe that resembled this dish.  Although I was unable to come up with an exact match I did come up with a combination that I think you will not only enjoy reading about but preparing as well.

    Let’s start with Gracie’s Basic Potato Croquettes Recipe:

    • 1 lb. potatoes
    •  2 tbsp. grated cheese
    • 1 egg
    • 1 clove of minced garlic
    • 1/2 tsp. fresh chopped Italian parsley
    • 1/4 cup Italian seasoned breadcrumbs
    • salt and pepper to taste
    • 1/2 cup flour – more if needed
    • 1/2 cup olive oil

    Clean potatoes well and boil with skins till tender.  Drain, cool, peel and mash the potatoes.  Mix the potatoes with the grated cheese, egg, garlic, parsley, breadcrumbs, salt and pepper. 

    Here’s the new part (borrowed in part from foodnflavors.com):

    Begin by rolling each croquette into either a cylinder or an oval.  Mom went with a oval I prefer a cylinder.  With you finger work a piece of goat cheese into the center and roll again.  Continue this process until you finish off the mix or in my first go with this, run out of goat cheese.

    Little disks of goat cheese

    Roll in flour and saute in  moderately hot oil until golden brown on both sides.  Vegetable oil works best.  Check to make sure the goat cheese doesn’t escape from the cylinders, but if some does run out it’s no big deal.

    To be safe, heat the oil to 180C and only place a few croquettes at a time in the oil.  Between batches wait until the oil returns to the 180C temperature  This will help to ensure that they will  not burst.  Move the croquettes to a tray layered with paper towels.

    For a real treat, serve with the Balsamic Mayo we featured in our Balsamic Blog last week.  Here are the basics of that mayo again, in case you missed it or click here.

    • 3 eggs,
    • a teaspoon of  Balsamic Condimento
    • juice of half a lemon

    I am truly sorrow I don’t have any photos of the finished product, as my camera was not working right.  I do promise that if Santa brings me a new camera, I will take some quality shots of this dish and do a re-post.

    Related articles:

    20% off Sitewide at WineTasting.com!  Use coupon code SIPME (Offer valid thru 12/31/13)


    Enhanced by Zemanta

    How to Make a Healthy Chicken Parmesan

    Chicken Parmesan as a sandwich or a stand alone dish is one of those classic Italian American foods that we all grew up with.  Take a look at Gracie’s Healthy Chicken Parmesan.

    The secret to making a healthy version of Chicken Parmesan is not frying the cutlets for more than 5 minutes.  At Gracie’s Ravioli (our brick and motor shop) we would spot fry the cutlets briefly before transferring them to the oven. This was a technique my mom used 40 year ago before anyone was overly concerned with how much fat they were absorbing in fried foods.  Today many Pizza shops and Italian restaurants still deep fry the cutlets sometimes in a cooking oil that that is far healthy.

    A second way to cut down on the fat with Chicken Parmesan is to use fresh Mozzarella.  The fresh stuff in lower in calories and fat.  If you can’t find fresh Mozzarella then use a part skin variety.

    360 Cookware
    Traditionally Chicken Parmesan is served over a bed of spaghetti or with a side dish.  You can cut down on the calories by substituting the spaghetti for sauteed vegetables.  All good tips for making this Italian/American staple a good for you meal.

    Here’s our recipe:

    • 4 boneless, skinless chicken breast halves 1/4 inch thick
    • 1/2 tsp salt
    • 1/2 tsp black pepper
    • 2 egg whites, lightly beaten
    • 1 cup seasoned  Italian bread crumbs
    • 2 Tbsp grated Parmesan
    • 1/2 Tbsp dried Italian seasoning
    • 1 Tbsp olive oil
    • 1 cup tomato sauce
    • 4 oz shredded part-skim mozzarella
    • Fresh basil leaves – garnish

    Directions:

    If cutlets are thick place them between plastic wrap and pound them to 1/4 inch thickness.  Season with salt and pepper.  Preheat the over to 350 degrees. In a bowl place the egg whites and in another combine and mix the bread crumbs, Parmesan and seasoning.

    With you left hand dip the cutlets into the egg white and with the right hand into the bread crumb mix.  Be sure to completely cover the cutlets with the bread crumb mix. Heat the oil in a large skillet and cook the chicken for two minutes on each side.

    Transfer the cutlets to a baking dish and cook for another 10 to 15 minutes.  Check to make sure the chicken is moist but cooked through. Start the broiler and when the chicken cutlets are ready top with tomato sauce and cover with the shredded Mozzarella.

    Keep them in the broiler for 2 to 3 minutes or until the cheese melts over the top. Place the finished cutlets on a bed of steamed vegetables and garnish with fresh basil.

    As with most traditional Italian/American foods you don’t need to go too crazy finding a wine pairing nor do you need to spend a lot of money on the wine.  Go with an Aglianico.  Aglianico’s have become my new favorite, go to Italian wine.  Wines made from this black grape are produced in the Basilicata and Campania regions of Italy and go well with meats and chicken dishes like our healthy chicken Parmesan.

     Azienda Bisceglia Aglianico del Vulture Gudarra 2008 (pictured above) – Is our top choice at a fair price at $19.99.

    Click Here to BUY NOW.

    Here is what Wine Spectator had to say about the Azienda Bisceglia Aglianico – “A firm, compact red, featuring plenty of ripe wild cherry and blackberry notes that slowly reveal hints of pine, ash and tobacco. Displays the rugged nature of the region.”
    90 Points


    20% off Sitewide at WineTasting.com!  Use coupon code SIPME (Offer valid thru 12/31/13)

    Pork Cutlets with Condimento Balsamic Vinegar

    The focus for November has been on Traditional Italian Foods and in my family, pork cutlets with balsamic dressing certainly filled that bill.

    LZ98_001_0016_11DMThe recipe I’m about to share with you is a bit of a diversion from the simple pork chops Gracie prepared for us on many a weekday night.  My father loved those chops and  my mom seemed to love preparing them. She had it down to a science.  One hand in the egg batter and with the other the chop moved to the seasoned breadcrumbs.  She could do this with her eyes closed.  When we opened the store customers would always be looking for something to bring home and dress it up like they spend the whole day making it.  On Mondays we featured our version of a Gracie’s standard – Pork Cutlets with Condimento Balsamic Vinegar.

    Our head chef Eric, certainly had a way with taking a simple recipe and spicing it up.  Gracie’s would never think about using an expensive imported Italian Balsamic vinegar on her chops.  She was more about simple, quick and the economy of feeding a family. Eric on the other hand had a shop full of ingredients at his fingertips and came up with this killer Pork Cutlet Recipe.

    LZ98_001_0025_11DM

    To start with Eric made a mayonnaise using the Condimento Balsamic Vinegar.  A teaspoon was all that was needed as this aged Balsamic really intensified the flavor of anything it came in contact with.  Once the chops were done, he would spread the mayo over the top and watch those customers eating at one of our tables giggle with enjoyment.

    For the Mayo:

    • 3 eggs,
    • a teaspoon of  Balsamic Condimento
    • juice of half a lemon

    Mix well in a blender.  Add:

    • 1/3 cup minced parsley
    • one teaspoon chopped capers 

    The Chops:

    • 4 (4-6 oz) boneless pork fillets, pounded to approximately ½ inch thick
    • 1/2 c. flour
    • 2 T. butter
    • 2 T. olive oil for sauteing
    • salt and pepper to taste

    Start by place flour in shallow dish and lightly dredge the pork fillets with flour.

    In a frying pan, heat olive oil and butter together over medium-high heat. Add the pork chops and cook for 3-4 minutes per side, be sure to turn the meat only once.  Remove from heat and season with salt and pepper to taste.

    Spread the Condimento Balsamic Mayonnaise over the chops and you’re done.  Serves 4.

    The Mayonnaise can be used to spice up hard boiled eggs and on any boiled meats.

    For a wine pairing I’m going to Piedmont and the Nebbiolo grape which of course means Barolo or Barbaresco.  My choice is Socre Barbaresco 2007 Scored 90 points from the Wine Advocate, I love the 2007 vintage as it is plenty age worthy but drinking wonderfully right now. 

    The $36.00 price tag may seem a bit steep for a pork chop dinner but this is more than your mother’s (or mine for that matter) take on chops.

    Look at what the Wine Advocate had to say: “This 2007 Barbaresco is a pretty, feminine wine with tons of Nebbiolo character in its spices, red berries, flowers and minerals. I particularly admire the way the wine’s inner juiciness and sweetness emerges over time, adding a wonderful sense of proportion to the classically built frame. Tasted a second time a few hours later, the wine came together even more beautifully.”

    BUY IT NOW!

    Enhanced by Zemanta

    How to Make the Best Meatballs

    Here is how to make meatballs so good that you will become a family legend?

    cropped-DMO_01411.jpg  On Sunday morning my mom started cooking early.  There was sauce to simmer and meatballs to prepare and cook.  The family was coming over to visit my grandparents and it was Gracie’s self appointed job to feed everyone.

    It was right around 8AM when I gave up any thought of trying to sleep in.  Between the constant movement of my mom in the kitchen and the oh so awesome aroma of Sunday Sauce cooking on the stove, I knew it was a lost cause. No sooner had my feet hit the floor when I was ordered to stir a pot, clean some dishes or run across the street to my aunt’s to pick up bread, cheese and the Sunday Chianti.  “Go fast” she would advise, “you can’t be late for nine o’clock mass.”

    This was a ritual I looked forward to.  The bread came form Brooklyn and I really loved it.  By the time I got home an end would be missing on of one of the loafs.  It was when I returned to the house however that I was truly rewarded.  A chunk of bread dipped in the gravy, with half a meatball stuffed inside, had me running off to church a happy boy. Meatballs

    Making great meatballs is hands on, here’s all you need to do to get you on your way to great meatballs.

    •    1 pound ground beef and one pound ground pork
    •    A loaf of day old Italian bread, just the inside, not the crust
    •    1 cup of milk (have some extra if needed)
    •    2 eggs
    •   1/2 cup fresh chopped parsley
    •    2 teaspoons olive oil
    •    Salt and pepper to taste

     Step 1:

    Combine the beef and pork in a bowl large enough for you to work comfortably.  If you don’t eat pork, substitute by using a 1/2 a pound of veal and a pound and a half of beef.  If using veal you may need to add a little extra salt to taste.

     Step 2:

    In a separate bowl combine the insides of the day old bread, which you ripped apart, and 1/2 cup of milk.  Make sure the entire bread is wet with the milk, add more if necessary.  If using a fresh loaf of bread and it’s soft enough, you can even use the crust.

     Step 3:

    Add the bread, eggs, parsley and salt and pepper to you meat, roll up sleeves, and mix thoroughly. The eggs are important as they will hold your meatballs together and keep them from braking apart during cooking.  Add the extra milk if the mixture is dry and you can also add breadcrumbs if you feel they are needed.

     Step 4:

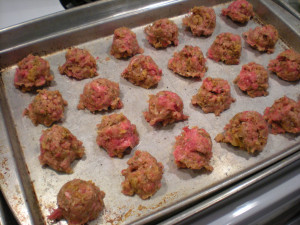
    Cover a large cookie sheet with wax paper and begin rolling your meatballs.  My mom had this down to a science, as she always grabbed the correct amount of meat and carefully rolled it into perfect round balls.  Just be certain that the ball is rolled tight enough so that it will not break up.  Place the meatballs on the cookie sheet.

     Step 5:

    Once your meatballs are ready, heat the olive oil in a skillet.  I love using cast iron, but any large skilled will do.  When the oil is hot enough begin adding the meatballs one at a time and cook until they are browned throughout, about 7 minutes.

    Tomato Meatballs

     Step 6:

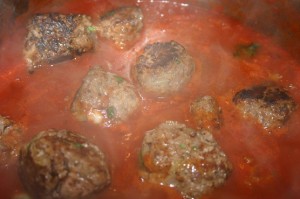
    If your making a sauce add the browned meatballs directly into the sauce.  I usually wait until the final 45 minutes to an hour of a slow cooking sauce, before I add my meatballs, but you can add them at any time.  I like to let my sauce simmer for nearly 2 hours, so you have time to get to church before you add the meatballs.  Two things happen here, the meatballs enhance the flavor of the sauce and by cooking the meatballs this way, and they are not as greasy. 

     If are not putting up a sauce, than add meatballs to a pot of chicken stock.  Make sure there is enough stock to completely cover the meatballs.  Bring to a boil and cook in boiling stock for 30 to 45 minutes.

     Step 7:

    Be prepared to become a meatball legend.

    Like this recipe?  If so you  need to subscribe to the Gracie’s Ravioli Newsletter, by giving us your first name and email address in the form on the top right of this page and receive for free Gracie’s Italian Cooking Basics.

     For best results with all your cooking needs be sure to visit www.GraciesProductReview.comCLICK HERE for our top stock pot

    Enhanced by Zemanta

    We’re Declaring November as “I Like Italian Food Month”

    We decided to declare November as “I Like Italian Food Month.”  With so many great recipes floating around the internet and more people discovering the joys of cooking Italian, it just made sense that we devote a month to Italian Food.

    So here is what we plan to do.  No less then twice weekly we will post our rendition of a classic Italian recipe.  By classic, I’m referring to some of the more traditional Italian foods, meals that you grew up with.  To start things off we’re going my mom’s version of Manicotti.

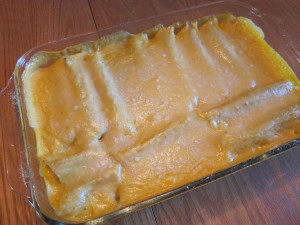
    Finished!

    Why start with Manicotti?  As a kid I never knew my mom could make a Manicotti.  It was by far my favorite dish, but it seemed I only enjoyed it when we ate out.  I forget the exact circumstance, but I apparently did something in which Gracie was very appreciative.  She asked me what I wanted for dinner and when I mentioned Manicotti, she agreed.

    She went right to it and soon afterwards it was not unusual to see Manicotti pop up for dinner on random Wednesday nights.  She worked a full time job, but had Wednesdays off and dinner was always a little bit special midweek.  In fact many of my older cousin that lived nearby would somehow get invited to Wednesday’s Dinner Party.

    The secret behind a good Manicotti, or any dish for that matter, is the ingredients.  My mom was a grocery shopper extraordinaire.  Whenever she when shopping it always included four or five stops.  Who had the best ricotta cheese, who had the best produce, and with meats, fish and chicken we’re talking a totally different day.  All for the purpose of getting the best ingredients.

    The one thing that Gracie’s relied on with her Manicotti was fresh Ricotta Cheese.  I can remember taking the bus with her to Bronx and Arthur Avenue just for fresh Ricotta.  By the way, if you’re visiting New York City and don’t include a stop to Arthur Avenue, you’re missing out.  Not nearly as special as it once was, Arthur Avenue in the Bronx still host great Italian Pork Stores, Authentic Italian Deli’s, Fish markets and the best Italian Restaurants in the city.

    The Manicotti:

    The Crepes:

    • 1 Cup Flour
    • 1 Cup Water
    • 2 Eggs

    Beat the flour, eggs and water (you may need a bit more water) to make a batter.  Pour a small amount of batter in a greased 9-inch frying pan under low heat.  Make sure the batter covers the entire pan.  Cook until the crepe can be easily removed from the pan.  The top should still be moist.  Lay the crepe flat and continue until all the batter is used up.  You should have enough for 10 crepes.

    The Filling:

    • 1 1/2 cups whole milk ricotta cheese.  If you can find fresh ricotta, go for it.
    • 1/2 pound shredded or diced mozzarella cheese
    • 1/4 cup grated Parmesan cheese
    • 1 beaten egg
    • 1/2 cup chopped Italian parsley
    • Salt and pepper to taste

    Mix all your ingredients together in a bowl.  When you have a nice consistency, spoon evenly into the center of a crepe and spread out using your spoon.  Roll the crepes and pinch the ends to seal.  Lay the crepes in a glass baking dish that has an even layer of sauce on the bottom.  Spoon the rest of your sauce over the top and cook in a preheated 325-degree oven to 25 minutes.  Remember these are fresh and will cook quickly, so keep a close check on them.  I sometimes lay a little Parmesan over the top as well. 

    The best red wine for your Manicotti feast is Barbera d’ Alba.  The third most planted red grape variety in Italy, known for deep color, low tannis and high levels of acid.

    My pick  La Spinetta Barbera d’Asti Ca Di Pian 2009 – Here’s what the wine maker had to say, “The bouquet has beautiful and complex aromas of black currant, dried plums and Indian tea. This is a complex, vibrant, focused wine has refreshing acidity and ripe fruit. Made with 100% Barbera.”  CLICK HERE!

    The Michele Chiarlo Barbera d’Asti 2011 has a good rating pedigree and the wine is medium bodied and robust with rich, ripe cherries and earth on the nose and an elegant palate. CLICK HERE!

    Be sure to finish off the meal with a good cup of espresso or cappuccino.  Check out our latest review with our choice as the top Espresso Maker –  The Saeco Via Venezia Espresso Machine. CLICK HERE!

    Want more classic Italian dinner ideas pick up “7 Days of Italian Cooking – Gracie’s Guide to Everyday Meals.”

    photo by: trenttsd

    How to Make the Best Umbrian Stew.

    I purchased a new Stockpot and thought the best way to break it in was by making a hearty Umbrian Stew.  The recipe I’m about to share comes from a cookbook my sister gave me at Christmas about 10 years ago.  Called Enoteca  by Joyce Goldstein, it is in the subtitle “simple, delicious recipes in the Italian wine bar tradition” that caught my attention.  (FYI – Enoteca translates to Wine Bar).

    Check out the review for my new Stockpot and the great price offered at Chefs Catalog. Click Here!

    The focus of Enoteca is to inspire home chefs to make a meal of many small dishes.  As the book jacket says,Eat less, but taste more – a great way to discover the terrain of both food and wine.”  Now that is a foodie strategy I can live by.

    Goldstein calls this stew La Padellaccia and is primarily a pork and borlotti bean stew.  If you’re unfamiliar with borlotti beans take a second to go back and read our blog post from January 29th of this year (https://graciesravioli.com/borlotti-beans). Goldstein points out that the recipe is quite rich which makes it a great meal to tap off our UN-official tribute to October as Comfort Food Month.

    Dried Borlotti Beans

    Before we get into the recipe itself, you got to understand a little bit behind the history of this dish.  Originating in Umbria  which is noted for its pork dishes, La Padellaccia (the wicked pan) is linked with ancient peasant traditions.  That fact along was enough to make me add this dish to my cooler weather menu.

    Now I know above we talked about eating less but tasting more, however this recipe serves eight, so be sure to have the gang over when preparing this stew.  Here goes:

    Ingredients:

    • 2 cups or about 1 pound of borlotti beans
    • 2 quarts water
    • 2 1/2 tsp. salt
    • 6 to 8 cloves of garlic minced
    • chopped needles from 1 fresh rosemary sprig about 2 tbsp.
    • 1 tsp.freshly ground pepper plus pepper to taste
    • 1/2 to 1 tsp. red pepper flakes
    • 4 tbsp. olive oil
    • 3 pounds boneless pork shoulder cut into 1 1/2 inch pieces
    • juice of 1 lemon
    • Grated Pecorino cheese

    Directions:

      Place the beans in a stockpot with water and soak overnight.  The next day, drain the beans and place in a saucepan with 2 quarts water.  Bring to a boil over medium- high heat, reduce the heat to low, cover and simmer until tender but not soft, about 40 minutes.  Add 1 tsp of salt during the last 15 minutes of cooking.  Remove from the heat and set aside.

    Combine the garlic, rosemary, the remaining 1 1/2 tsp salt, the 1 tsp pepper and red pepper flakes to the bowl.  Heat the olive oil in a large sauce pan over high heat.  Add the pork pieces in batches and stir until golden, about 8 to 10 minutes.  Sprinkle the browned meat with the garlic mixture and lemon juice, mixing  is quite lean be sure to add water or stock if the meat seems to dry or stick.

    If when the pork is done there is extra fat in the pan. spoon it into a saucepan and use it to warm the cooked beans.  Otherwise reheat the beans over low heat in their own liquid.  Transfer the beans to a large serving dish and sprinkle with lots of black pepper and Pecorino cheese.   Spoon the pork over the beans and serve.

    Alternatively, you can combine the pork and beans in a pot and heat together to serving temperature, then transfer to a serving dish and sprinkle with the pepper and cheese.  Serve the stew hot or warm.

    I’m a big fan of pairing foods from a region with quality wines from the same region.  I’m suggesting a Montifalco Sagrantino to accompany this dish.  These are powerful wines with great depth.  Look for wines with a bit of age.  I recommend the 2006 Scacciadiavoli Sagrantino di Montefalo, which scored 90 points from.  Dark fruit takes center stage while offering great balance and class. Another choice is the 2007 Antonelli Sagrantino di Montefalo, a quality producer and a vintage year that is drinking great right now.


      Related articles

    Enhanced by Zemanta