Make Your Saturday Breakfast Special with Ricotta Pancakes

Every once in a blue moon on a Saturday morning, my mom would do something special and make Ricotta Pancakes.  She really didn’t fancy using ricotta cheese for breakfast, but when she did, no one ever slept in.

There is just something about the spring that reminds me of my mom’s Ricotta Pancakes.

Maybe it had to do with the fact that she had Ricotta cheese left over form her Easter Pies, but it seemed to be the only time of year she made them.  I don’t have her recipe unfortunately, as with many of Gracie’s treats she often just winged it, but I did find some suggestions online and decided to give it a whirl this weekend.

 My mom’s pancakes had a lemon zing to them and the recipe I found that seemed to come the closest was from the Williams-Sonoma Kitchen.  One suggestion I recommend

Ricotta Hotcakes with lemon curd, strawberries...

Ricotta Hotcakes with lemon curd, strawberries and raspberry coulis – Replete Providore (Photo credit: avlxyz)

is that you move the Ricotta cheese to a strainer and let drain of any moisture for a few minutes.  You don’t need the extra water and if using fresh Ricotta, this is a must.

Ricotta Pancakes really do melt in your mouth and I suggest you have some fresh berries on hand to top them off.

Ricotta Pancakes.
 
Author:
Recipe type: Breakfast
Cuisine: Mediterranean
 
Ingredients
  • 1 cup ricotta cheese
  • 1 cup milk
  • 3 eggs, separated
  • ¼ cup sugar
  • Zest and juice of 1 lemon
  • 1½ cups cake flour
  • 1 Tbs. baking powder
  • ¼ tsp. salt
Instructions
  1. In a large bowl, whisk together the ricotta, milk, egg yolks, sugar, lemon zest and juice until smooth. Sift together the flour, baking powder and ⅛ tsp. of the salt over the ricotta mixture and stir with a wooden spoon until just combined.
  2. In another large bowl, using a whisk beat the egg whites until frothy. Add the remaining ⅛ tsp. salt and continue beating until soft peaks form. Using a rubber spatula, fold one-third of the egg whites into the ricotta mixture, then gently fold in the remaining whites.
  3. Preheat a griddle over medium heat. Spray the griddle with nonstick cooking spray. Ladle ⅓ cup batter onto the griddle for each pancake. Cook until bubbles form on top and the pancakes are golden underneath, 1 to 2 minutes. Flip the pancakes and cook for 1 minute more. Transfer to a warmed plate. Repeat with the remaining batter. Makes 12 to 14 pancakes.


Enhanced by Zemanta

Italian Wheat Pie

 A big tradition for my mom at Easter was to make her traditional Italian Wheat Pie.  Super sweet and loaded with Ricotta cheese, this pie was always a huge hit.

I love Italian Wheat Pie. Of all the great dishes my mother’s kitchen produced at Easter time this was by far my favorite. I like it so much that I make it to this day and don’t wait for Easter to do so.

It is a known fact that Italians know how to break a fast. Every region in Italy in preparation for Easter Sunday creates a special pie or dish that ends the Lenten fast and celebrates the holiest day in the Christian calendar.

Wheat Pie is a traditional Easter Pie, made with tons of sugar, eggs, ricotta and cooked wheat. My mom used to add citron or other candied fruit to her pie and always included fresh wheat berries as opposed to the precooked canned variety. The wheat berry is getting harder and harder to find so I settle for using the can wheat most of the time. Taste just as good and saves some time.

Italian Wheat Pie
 
Author:
Recipe type: Dessert
Cuisine: Italian
 
Sweet and loaded with Ricotta Cheese
Ingredients
  • The Dough
  • 6 cups of flour
  • ¼ tablespoon of salt
  • 1 tablespoon sugar
  • 2 sticks of butter
  • 5 eggs
  • The Filling:
  • ½ cup wheat berries or one small can
  • ½ pounds of whole milk ricotta cheese
  • ½ cups of sugar
  • 2 tablespoons of orange flavored water
  • ½ tsp of vanilla
  • 1 tablespoon of orange zest
  • 1 tablespoon of lemon zest
  • 5 eggs and 2 egg yolks
Instructions
  1. Tip: you can also use a pre-made pie crust found at the super market. The pre-made pie crust work just fine and can be a real time savor. Pick up an extra one and use it to over the top of your finished pie.
  2. If you really fancy making your own dough, here goes:
  3. Mix together flour, salt and sugar. If you have a food processor or mixer this will help. Cut butter into the flour mix and blend, add eggs one at a time and form a ball of dough. Set aside or can be made a day in advance and kept in the refrigerator.
  4. Pasteria:
  5. ½ cup of wheat berries. If you can’t find wheat berries, look for the pre cooked cans. Most Italian shops will have them and they will save you a bunch of time.
  6. Place wheat berries in a pot cover with water and let sit overnight. Boil the berries for 1 hour the next day and drain. Add a little sugar to the pot, cover again with milk and cook until soft. Drain and set aside to cool.
  7. Beat the eggs together and add ricotta, sugar, orange water, vanilla and orange and lemon zest. Mix well and add the Pasteria. If you made your own dough, cover the bottom and sides of a 9 inch pie pan and fill with the mix. Save some pie dough and cut into strips and lay over the top of the pie.
  8. You should have enough filling and dough to make two pies and if you purchased premade pie crust be sure to have an extra one available to use for your strips.
  9. You may have noticed that I didn’t use the citron mentioned above. Truth of the matter is I don’t like it but many do. So if this is something you crave in your Wheat Pie, by all means add it to the mix. Cut the citron into ¼ inch cubes before adding to the mix.
  10. Bake pies in a preheated 350°F oven for about 45 minutes to 1 hour, or until the bottom of the crust is light brown and the top of the pies are golden. Keep in the oven to cool for another 45 minutes to 1 hour.
  11. Happy Easter!


Enhanced by Zemanta

What is the Meaning of a “Ragoút”

It seems that recently I have been seeing the term ragoút when defining a recipe selection.  Now I consider myself a fairly seasoned Kitchen Chef, but have to admit a bit of ignorance behind the meaning of ragoút.

I took to the internet to help me come up with a definition and found that Webster’s and Wikipedia are  not all that clear on the term Ragoút as well.  Below are their definitions, a slight commentary and a cool, Ditalini Vegetable Ragoút

Pappardelle with vegetarian ragout   SONY DSC

Webster’s Definition:

1. A stew of meat, vegetables, and spices; well-seasoned meat and vegetables cooked in a thick sauce. 2. Mixture, Mélange

Wikipedia’s Version:

1. The term ragout (French ragoût) refers to a main-dish stew. 2. The term comes from the French ragoûter, meaning: “to revive the taste”

Both sources refer to ragoút as a stew, but upon further review of their definitions we can see that ragoút is more of a topping or mixture used to enhance

365.257 - Baked Penne Pasta with Wild Mushroom...

365.257 – Baked Penne Pasta with Wild Mushroom Ragoût (Photo credit: nettsu)

a meal.  The above photos and the picture with a reference on the left seem to back up the topping idea.  It should be noted that many times a ragoút is made with noodles or a small pasta like ditalini.  Below in the “related articles,” are a few  recipes that support this definition.

I’m sure some of you are reading this and saying, “why is Mike so obsesses with this term, as it really is no big deal.”  Well the purpose of this website is to expose you, the reader and me, the author, to new, simple and healthy approaches to meals that add a  Mediterranean feel.

That being said, as I was walking the aisles of a Publix’s supermarket in St. Augustine’s this week (visiting my daughter in college with the family), I came across this recipe which is used as an accompaniment for Creole-Spiced Salmon.   This Ditalini Vegetable Ragoút seemed to be right up Gracie’s alley.  I hope you enjoy it and I promise to give you the Salmon recipe sometime soon.

Ditalini Vegetable Ragoút
 
Author:
Recipe type: Main
Cuisine: French
 
Lots of ingredients I like.
Ingredients
  • 2 medium shallots, chopped
  • ¼ lb. fresh asparagus spears, coarsely chopped
  • 2 Tbsp. fresh chopped Italian parsley
  • 1 tsp, fresh thyme
  • 1 cup ditalini pasta
  • 1 Tbsp. olive oil
  • 1 cup grape tomatoes
  • 1 (15.5 oz) can cannelini beans
  • 2 Tbsp. herb garlic butter
  • 2 Tbsp. capers
  • ½ tsp. kosher salt
  • ¼ tsp. pepper
Instructions
  1. Bring water to a boil
  2. Chop shallot, asparagus, parsley and thyme
  3. Cook pasta and reserve ¼ cup of pasta water for later use
  4. Preheat a large saucepan on medium heat fro 2-3 minutes. Place oil in pan and add shallots, asparagus, pasta, tomatoes and beans, cook and stir another 3 minutes or until thoroughly heated
  5. Stir in herbs, butter, capers, salt, pepper and reserved pasta water, cook and stir for ⅔ minutes or until well heated. Serve.


wine.comRelated articles

Enhanced by Zemanta
photos by: Luca Nebuloni & vauvau

3 Simple Ways to Spring into Artichokes

Gracie loved artichokes and years ago the only time of year you could find them in the marketplace was early Spring.  She had her favorite way of preparing them but I’ve come up with three more.

Stuffed ArtichokeMom always stuffed her artichokes with a garlic rich breadcrumb and Parmesan cheese stuffing and then steamed them for 30 to 40 minutes.  They always came out perfect and my sister and I would fight over them like crazy.  A few weeks back I shared with you her recipe in our Valentine’s Day post, but today I would like to offer up three other suggestions for this unique vegetable.

The suggestions listed below are for whole, fresh artichokes and not the kind found jarred in either oil or water.  For the most part the jarred variety are just the heart, which is in fact the most favorable part.  Artichokes are in fact very good for you and considered a super food.  Of course the fresher the food the better.

#1 Grilled Artichokes with Stems- When I had my Italian Specialty store, these were a big hit.  Initially we used to buy them imported, already prepared and grilled in olive oil.  We later found a supplier that sold us the clean artichokes with stems and we grilled them ourselves.  Soak them in Olive Oil, season with sea salt and grill until they are lightly browned.  You can find fresh, cleaned artichokes with stems in most specialty food stores.

#2 Roasted Sicilian Artichokes – Travel to Sicily this time of year and you will find many road side vendors offering this Sicilian specialty.  The artichokes are cooked over hot coals or as the locals would say ‘a braci.’ Sicilians will mix pancetta bacon, chopped onions, garlic and celery, combined with olive oil and lemon juice.  The artichokes are cleaned, with the stems removed and the top 1/2 inch cut off.  The lower leaves insulate the the inner heart, leaves and stuffing from burning and the finished smoky end product is out of this world.  Get the full story on this recipe at Taste of Sicily.

Simple Roasted Artichokes Recipe  #
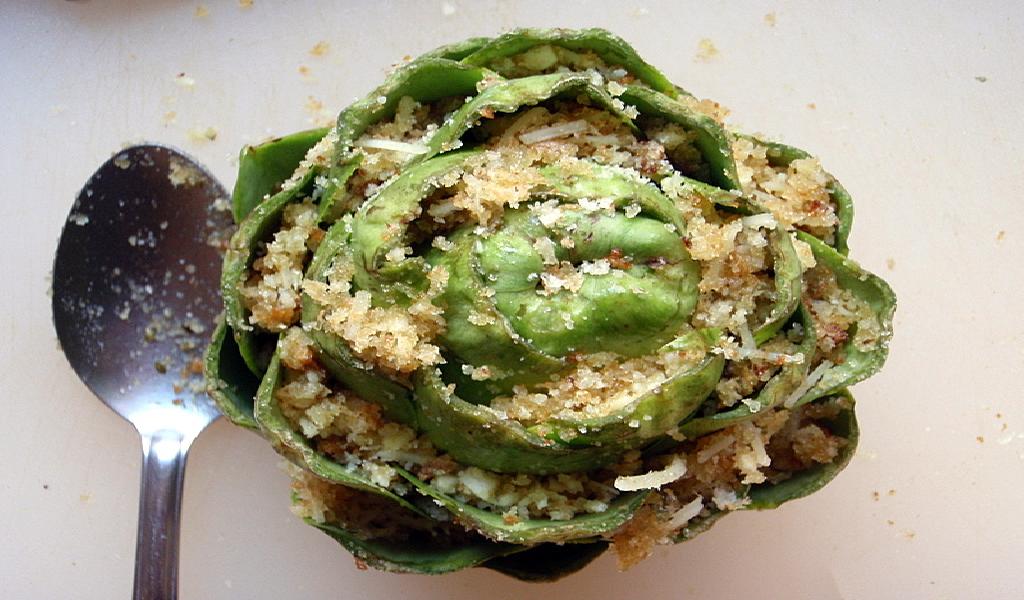
3 Simple  Roasted Artichokes – Have you ever roasted garlic?  Well that’s pretty much the way we’re preparing these artichokes.  First off, we clean and cut the artichoke in a way that is fairly universal.  Cut the stem so the artichoke can sit straight.  Remove the lower leaves and cut about an inch off the top.  Snip any remaining leaves that are sharp.  Take a clove of garlic and shove it into the center of the artichoke and sprinkle with salt.  Drizzle with olive oil and squeeze 1/2 lemon over the top.  Wrap each artichoke in tin foil to form a tight seal.  Bake at 425 for an hour and a half and let sit for 10 minutes before enjoying.

Do yourself a favor and pick up some artichokes for this weekend.  On top of being a healthy food choice artichokes are also considered an aphrodisiac. Again, I refer to our Valentine’s Day post for more on that.

Chefs Catalog


Related articles

Enhanced by Zemanta
photo by: joyosity

Cannellini Bean Recipe

I’m always on the lookout for food ideas that seem to fit easily into the Mediterranean type of diet, and this Cannellini Bean Recipe (or white kidney beans) with Broccoli Rabe and Lemon fits the bill. 

I stole (literally) this from the December issue of Bon Appetite magazine.  I was in orthodontist office waiting for my son’s visit to end when I stumbled upon this recipe.  With my back turned to the receptionist, I tore the page our of the magazine.  I was feeling pretty guilty when I noticed further down the issue many other recipes had met up with a similar fate.

This recipe has a lot of good this going for it.  First off it fits into the healthy part of a Mediterranean Diet.  One look at the ingredients and pretty much all the major components are good food choices.  Secondly it falls into the quick and easy category and should take no more than 25 minutes from start to finish.

White Cannellini beans

White Cannellini beans (Photo credit: Wikipedia)

Bon Appetite calls this Cannellini Bean Recipe a side dish that pairs well with roasted chicken or pork tenderloin.  That certainly sounds like a complete meal, but I believe it can stand up on its own if you are looking for something quick and healthy during the week. For those of you who don’t like the bitterness of Broccoli Rabe, regular Broccoli is  good substitute.


Cannellini Bean Recipe
 
Author:
Serves: 4
Prep time:
Cook time:
Total time:
 
A perfect quick and easy Mediterranean Dish.
Ingredients
  • 3 Tbsp. olive oil
  • 1 small lemon, very thinly sliced with seeds removed
  • 2 anchovy fillets packed in oil
  • 4 garlic cloves, thinly sliced
  • ½ bunch of broccoli rabe, chopped
  • Kosher salt and freshly ground pepper to taste
  • 2 15-oz cans of cannellini beans
  • ¼ cup fresh flat leaf parsley leaves
  • 2 Tbsp. grated Parmesan plus more for serving
  • Crushed red pepper flakes (optional)
Instructions
  1. Heat oil in a heavy pot over medium heat. Add lemon, anchovies, and garlic. Cook, stirring occasionally the lemon is softened and brown in spots and the anchovies fall apart - about 5 minutes. Add the broccoli rabe; season with salt and pepper and cook, tossing occasionally until bright green and crisp-tender, another 5 minutes.
  2. Add the beans and a ½ cup of water to the pot. Bring to a boil; reduce heat and simmer, stirring until flavors have melded and liquid is reduce by half. You want this dish to be saucy so after another 5 minutes mix in the parsley and Parmesan cheese.
  3. Transfer to a platter, sprinkle with red pepper flakes a


wine.com

Enhanced by Zemanta

Feast of Saint Joseph

Last year I shared with you my mom’s tradition of baking bread and delivering it to neighbors on the Feast of Saint Joseph the Carpenter.  Sicilians and other Southern Italians celebrate this Saint’s day every March 19th.

I was browsing on my post from last year and realized that I shared with you mom’s recipe for St. Joseph’s Soup but not the bread, which was really the centerpiece of the day.Click Here to revisit the post from last year and read on for the bread recipe.

St. Joseph’s Day Bread

Ingredients:

  • 1 1/2 cups of warm water
  • 2 packages of dry yeast
  • 2 Tbsp. of shortening
  • 1 Tbsp. sugar
  • 1 Tbsp. oil
  • 2 tsp. salt
  • 1Tbsp. Anise seeds
  • 4 1/2 cups flour
  • 1 egg slightly beaten

Preparation:

Combine in a bowl the warm water, yeast, shortening, sugar, oil, anise seeds and salt. Let this sit for 5 minutes.

In a mixing bowl put 2 1/2 cups of flour and add the yeast mixture. Beat together

Yeast bread dough, ready for proving

Yeast bread dough, ready for proving (Photo credit: Wikipedia)

until all ingredients are completely blended. Stir in enough of the remaining flour to form a dough. Turn dough onto a floured board. Knead in more of the flour to form a stiff and smooth dough. Shape it into a ball. Place it in a greased bowl, cover and let it rise in a warm draft free location until dough doubles in size.

Punch dough down and divide the dough into 6 equal pieces. Cover and let the dough rest for 10 minutes. Roll each piece of dough into a 12 inch long rope. Take 3 of the ropes and braid together to form a long braid, you will get 2 loafs of bread. Place on a greased baking sheet, cover and let rise in a warm draft free location until double in size.

Brush top with beaten egg and sprinkle some additional anise seeds over the top of the bread. Bake in a preheated 400 degree oven for 25 minutes or until golden brown. Remove from cooking sheets and cool on wire racks

Feast of Saint Joseph
 
Author:
Recipe type: Bread
Cuisine: Italian
 
St.Joseph's Bread is a tradition in many Southern Italian Regions.
Ingredients
  • 1½ cups of warm water
  • 2 packages of dry yeast
  • 2 Tbsp. of shortening
  • 1 Tbsp. sugar
  • 1 Tbsp. oil
  • 2 tsp. salt
  • 1Tbsp. Anise seeds
  • 4½ cups flour
  • 1 egg slightly beaten
Instructions
  1. Combine in a bowl the warm water, yeast, shortening, sugar, oil, anise seeds and salt. Let this sit for 5 minutes.
  2. In a mixing bowl put 2½ cups of flour and add the yeast mixture. Beat together
  3. Yeast bread dough, ready for proving
  4. Yeast bread dough, ready for proving (Photo credit: Wikipedia)
  5. until all ingredients are completely blended. Stir in enough of the remaining flour to form a dough. Turn dough onto a floured board. Knead in more of the flour to form a stiff and smooth dough. Shape it into a ball. Place it in a greased bowl, cover and let it rise in a warm draft free location until dough doubles in size.
  6. Punch dough down and divide the dough into 6 equal pieces. Cover and let the dough rest for 10 minutes. Roll each piece of dough into a 12 inch long rope. Take 3 of the ropes and braid together to form a long braid, you will get 2 loafs of bread. Place on a greased baking sheet, cover and let rise in a warm draft free location until double in size.
  7. Brush top with beaten egg and sprinkle some additional anise seeds over the top of the bread. Bake in a preheated 400 degree oven for 25 minutes or until golden brown. Remove from cooking sheets and cool on wire racks


Enhanced by Zemanta

A World of Seasoning

Herbs, spices and other seasonings are a natural and healthy way to add a lot of flavor to your recipes without adding a lot of extra calories.

With a little practice, you can create an endless variety of delicious recipes, such as Mediterranean-inspired favorites bursting with the fresh flavors of lemon, garlic and rosemary and spicy Mexican dishes featuring cilantro, cumin and chili powder. The flavor in herbs and spices are also great alternatives to salt.

Of course, your options won’t end there. A wide range of herbs, spices and seasonings are

English: Spices in Mapusa Market, Goa, India.

English: Spices in Mapusa Market, Goa, India. (Photo credit: Wikipedia)

used throughout the world to make food taste better, and in some cases, last longer. Over time, certain flavors have come to represent the culinary identity of the areas where they originated. In large part, the seasonings you choose will define the direction of your own culinary development, as well.

With a little creativity, you can put a fresh spin on some of your favorite tried-and-true recipes by simply swapping out the herbs, spices and seasonings you use. For example, if you add fresh or dried basil or oregano to diced tomatoes, chopped onion and finely minced garlic, you have the makings of a wonderful red Italian sauce. On the other hand, if you replace the basil and oregano with cilantro and lime juice, those same ingredients become the foundation for a fabulous homemade salsa recipe.

To help inspire you, the following chart shows some of the most popular culinary ingredients based on geographic region.

Spices and herbs on a local market in Cairo, Egypt

Spices and herbs on a local market in Cairo, Egypt (Photo credit: Wikipedia)

Cuisine: Popular Herbs, Spices & Seasonings

Italian:
basil, oregano, marjoram, rosemary, parsley

French:
thyme, French tarragon, rosemary, basil, sage, mint, marjoram

Greek:
dill, lemon, oregano, fennel

Spanish:
saffron, smoked and regular paprika, rosemary, thyme

German:
mustard, rye, caraway seeds, borage

Mexican:
cilantro, chili powder, cumin, Mexican oregano

Indian:
curry powder, coriander, cumin, turmeric

Chinese:
five-spice powder, star anise, fennel seed, cloves, cinnamon, ginger

Thai:
Thai basil, cumin, turmeric, lemon grass, cinnamon

Of course, this chart is far from comprehensive, but it can serve as a good reference point for assembling your own collection of must-have herbs, spices and seasonings.

Keep in mind, some herbs, spices and seasonings, such as salt, black pepper and garlic, have an almost universal appeal that isn’t limited by geographic borders. Chances are you will notice those items popping up in recipes from all over the world. As a result, you may want to keep an adequate supply of these basic ingredients in your own pantry or spice rack.

You will also see a lot of crossover among dishes from countries that border one another. For example, French, Italian, Greek and Spanish dishes often feature many of the same herbs, such as basil, rosemary, oregano and thyme. Of course, this isn’t surprising when you consider how these populations interacted with and melded together over the course of history. Depending on your personal tastes and cooking habits, these ingredients may be good to keep on hand, as well.

Have you ever considered fresh herbs?  Fresh herbs are super easy to grow from seed or

Herbs

Herbs (Photo credit: Angela de Março)

from cuttings in your own garden and many can be brought indoors for year-round enjoyment. However, if growing fresh herbs isn’t your thing, many popular fresh and dried varieties are readily available. Dried herbs can be a great alternative to fresh, but take note of expiration dates and suggested storage methods. Dried herbs, spices and seasonings can be quite expensive, so buy smaller amounts at one time if you won’t be using them often.

Homemade Taco Seasoning Mix

This recipe only takes a couple minutes to put together and costs less than buying pre-packaged taco seasoning. It also has less salt and no artificial additives or preservatives.

Ingredients:

  • 2 tablespoons chili powder
  • 1 tablespoon ground cumin
  • 1 teaspoon ground coriander
  • 2 teaspoons garlic powder
  • .5 teaspoon crushed red pepper flakes
  • 1 teaspoon smoked paprika
  • 1 teaspoon salt
  • 2 teaspoon black pepper

Combine all ingredients in an airtight container and shake well to combine. Use 2 – 3 tablespoons per pound of ground beef (use more or less according to individual taste preferences).

This recipe can also be made in larger batches. Store unused amounts in an air tight container for up to 6 months.

Thanks To Tasting Taste for guest blogging on this post!


Enhanced by Zemanta

Discover Wild Rice

Continuing with our March theme devoted to Rice let’s take a look at one variety that many don’t consider a rice at all.  Read on as we discover ‘Wild Rice.’

Wild rice, or “manoomin,” an Ojibwe word roughly translated to mean “good seed,” is actually not rice at all, but is a grass.  Native to lakes and rivers in North America, the seeds from this grass have been harvested since before written history of the region existed.

Wild Rice

Most of the wild rice we see today is gathered by hand in the exact way it was centuries ago. Pushing a canoe or small boat through the wild rice patches on a lake, the tall grass is bent over the boat and struck with a stick to dislodge the ripe kernels. A team may return to the same wild rice patch in a few days to gather the kernels that have since ripened.

The distinctive color of wild rice will range from very dark charcoal to dark brown. This difference is due to the treatment during curing and the ripeness of the wild rice kernels when harvested. There is very little difference in the appearance or flavor of rice from lakes and rivers or farms.

Cooked wild rice.

Cooked wild rice. (Photo credit: Wikipedia)


Even though wild rice is typically priced higher than
other rice products, adding even a small amount to a rice dish is often enough
to make a real impact. With its nutty flavor and ‘toothy’ texture, wild rice
gives a delightful twist to any recipe, turning an ordinary rice dish into a
culinary adventure!

Below are a few Soup Recipes that incorporate wild rice.  I hope you enjoy them!

Spiced Up Wild Rice Mushroom Chowder

  • 2 tsp cooking oil
  • 8 oz fresh mushrooms, sliced
  • 1 stalk celery, chopped small
  • 1/2 cup flour
  • 4 cups vegetable broth or water
  • 3 cups cooked wild rice
  • 1 tsp sea salt
  • 1/2 tsp curry powder
  • 1/2 tsp dry mustard
  • dash allspice to taste
  • dash hot sauce to taste
  • 1 1/2 to 2 cups half-n-half (or whole milk)

Put the oil in a large soup pot over medium heat, add mushrooms and celery and and cook, stirring, until softened and mushrooms slightly brown.
Turn heat down to medium-low.

While stirring, sprinkle flour over the mushrooms and celery and cook, stirring constantly, until flour turns golden, about 1 to 2 minutes.
Continue stirring and slowly pour in the vegetable broth or water; continue stirring and cooking until the broth thickens slightly.

Add the remaining ingredients, stirring to combine.
Turn heat to low, taste and adjust seasonings as you like.
DO NOT BOIL!  Just heat until soup is hot, stirring frequently.

Remove from heat, cover pot and let stand for 3 or 4 minutes before serving. Ladle into soup bowls and add a dot of butter to each serving if you wish. A sprinkle of fresh parsley is also nice.

Will serve 2 to 4.

Wild Rice Cauliflower Soup

  • 1 medium size onion, diced
  • 1 cup finely chopped celery
  • 1 cup Sliced fresh mushrooms
  • 1/4 cup cooking oil
  • 1 Tbsp butter
  • 1/2 cup flour
  • 1 quart chicken broth
  • 2 cups COOKED wild rice
  • 2 cups COOKED cauliflower pieces (bite size)
  • 1 cup half-n-half or cream

In a soup pot over medium-low heat, add the onion, celery, and mushrooms along with the cooking oil and butter; cook until vegetables are softened.

With soup pot still over heat, sprinkle in the flour and stir until flour disappears, then continue stirring and slowly pour in the chicken broth, stirring constantly until soup thickens.

Now add in the wild rice, cauliflower, and cream and carefully stir until blended well. Cook just until heated through; do not allow to boil.

Serve immediately – Will serve 4 to 6.


Enhanced by Zemanta

Rediscover Rice – Our Superfood for March

Get To Know Your Rice Varieties

 With more than 40,000 varieties worldwide, we thought we’d keep our sanity by narrowing the list down to those we most likely could find in a store.

 To begin, let’s look at a few basic rice facts. Rice is a grain that grows in fields or paddies and has three edible parts; the bran, germ, and endosperm. Rice that has been milled and polished to remove the hull, bran, and germ is called white rice. Rice that has been hulled only, leaving the bran and germ intact is called brown rice. Brown rice and white rice are not actually species or varieties of rice, but are more accurately the result of a process.

Now that we have that straight, let’s take a look at what we would most likely find on a grocery shelf in America when we shop for rice.

IMGP7336

Brown Rice

This rice is usually considered ‘whole grain’ rice, basically because the rice was not milled, leaving much of the bran and germ intact. Only the hull is removed. Brown rice is available in long grain, medium grain, and short grain. Long grain brown rice will remain somewhat separated when cooked, while medium and short grain brown rice kernels will tend to cling together more when cooked. All brown rice has a light, nutty flavor due to the remaining bran. Brown rice offers more fiber and the nutritional benefit of the bran and germ. You will need more cooking time for brown rice than white rice, but the delightful nutty flavor of brown rice may be worth the wait.

White Rice

This is another generic term used more to describe the rice than to name a variety. White rice is processed to remove the hull, bran, and germ, leaving just the internal endosperm, which is white. White rice can also be purchased in long grain, medium grain, or short grain, but all cook up a bit stickier than any length brown rice grain. Enriched white rice has been added to American shelves since a severe shortage in folic acid was found to be the cause of birth defects. Other nutrients have been added back into white rice, as well.

Arborio Rice

This rice is sometimes mistakenly called risotto in America. The grain gets its name from a town in Italy where it is grown. Arborio rice is used to cook the dish, risotto, which is a very creamy dish created by adding liquid to the rice, stirring, then adding more liquid and stirring some more until the liquid is absorbed and the rice is tender.

Jasmine Rice

If you cook any Asian dishes, you might know this rice. With a super sticky finish, this rice is perfect for dishes that need to hold up under a lot of ingredients. The texture is very popular in stir fry meals. The rice is also very fragrant.

Basmati Rice

This rice is from India. When cooked, it stays fluffy and separates. Although some may confuse it with Jasmine rice, they are not similar. This rice has an aroma, but it is not like Jasmine. Once you learn the difference, you will not confuse the two.

file8141339581121

Converted Rice

This is a process which produces an ‘instant rice’ to some degree. The rice grain is steamed before milling, resulting in a shorter cooking time. This may be handy, but the nutrients are compromised during the processing. Any rice that has a reduced cooking time was processed to a great degree.

Of course, this just covers the basics of the rice varieties found on the grocery shelves in the United States. Since we know there are over 40,000 varieties worldwide, we know we are missing some important rice choices to enjoy. This simple primer should get you started, however, to find the best rice for your family’s personal tastes.

We are going to devote the month of march to Rice, with many great recipes and some fact finding articles.  Hope you enjoy it!  Here’s a cool recipe:

 Italian Antipasto Rice Pot

  •  1 1/2 cup water
  • 1/2 cup tomato juice
  • 1 cup uncooked rice
  • 1 tsp dried basil
  • 1 tsp dried oregano
  • 1/2 tsp kosher salt
  • 1 can (14 oz) artichoke hearts, drained and chopped
  • 1 jar (7 oz) roasted red peppers, drained and chopped
  • 1 can (2 oz) sliced ripe olives
  • 2 tsp fresh chopped parsley
  • 2 tsp fresh squeezed lemon juice
  • 1/2 tsp black pepper
  • 2 tsp grated Parmesan cheese

In a large saucepan, gently stir together the water, tomato juice, rice, basil, oregano, and salt. Put over medium-high heat, bring to a boil, then immediately turn heat down to low, cover pot, and simmer gently until rice is cooked – about 15 to 20 minutes depending on what rice you choose.

Remove pot from burner and add the artichokes, red peppers, olives, parsley, lemon juice, and black pepper. Cover pot and let sit for 3 or 4 minutes to let heat through. Sprinkle the Parmesan cheese over the top and serve immediately.

Will serve 6 as a side dish or 4 as a main dish.

You can add some thinly sliced hard salami if you wish to more closely resemble an antipasto platter.

CLICK HERE for Gracie's Complete Collection in the Italian Living Series
CLICK HERE for Gracie’s Complete Collection in the Italian Living Series
Enhanced by Zemanta

Grandma’s Home Made Pizza

For years I been searching for my Grandmother’s Home Made Pizza Recipe, but to no avail.  I have learned however, that life is sometimes just a bunch of coincidences thrown in together.  Check this one out!

Last week at the age of 96, my Aunt passed away.  The last in a long line of aunts and uncles that provided me and my cousins with nothing more than good memories and fantastic traditions.  After the funeral I’m driving my older cousin Frankie home.  The conversation, as it usually does, turned to food.

Now Frankie is probably the most unlikely person in my family to hold onto a recipe.  In fact I would be shocked if he even knows how to boil water.  Anyway, out of the blue he starts talking about grandma’s pizza.  I’m in shock how he tells everyone in the car that Grandma always made it for him on his birthday.  “A simple recipe,” he tells me, “thin crust, lightly covered with gravy (all my family calls sauce gravy), Mozzarella and Ricotta Cheeses, topped with basil.”

Now I’m really getting excited and I ask, cutting him off in mid sentence “The dough?  How did she make the dough, it was special,” I scream.  “Can’t help you there Cuz, I just know it sat in the fridge for a day.”  OK, so I’m on to a hot lead with Grandmas Pizza, but unfortunately the older generation has all passed on and I’m the one who is accountable for all the recipes.

The very next day I come home and there is a Martha Steward Living magazine in the mailbox.  Weird I think, as we don’t even subscribe.  In the lower right corner of the cover a headline reads “PIZZA: DELICIOUS TOPPINGS, AMAZING CRUST.”  I tear open to page 90 and there is a recipe for a long, slow rising dough, that I swear came from heaven.  If this isn’t the secret dough that I been searching for, it is certainly a very close second.

The following is the Basic Pizza Dough recipe as given in Martha Steward Living magazine.  For the toppings you can come up with your own, but I’m showing you how I remember it, many years ago.  Like to receive the magazine, Click Here (not an affiliate link, I’m just excited to find this Dough recipe).

Basic Pizza Dough

  • 4 cups unbleached bread flour, plus more for dusting
  • 1 1/2 tsp. instant dry yeast  (preferably SAF-instant)
  • 1 3/4 cups filtered or bottled water at room temperature
  • 2 1/4 tsp coarse salt
  • 1 Tbsp extra-virgin olive oil, plus more for brushing and bowl

In a large bowl whisk together flour and yeast.  Slowly add water, mixing with a wooden spoon until incorporated.  Stir in salt and oil.  Expect the dough to be lumpy and raggedy.  Brush with oil, cover bowl with a dry kitchen towel and let rest for 1 hour.

Turn out dough onto a floured surface and pat with flour.  Martha suggest you flour your hands while you work.  Holding two opposite sides, pull the dough until about one foot long, then fold back onto itself and pinch ends.  Repeat 4 more times, rotating dough each time to stretch alternate sides.  The dough should begin to feel smooth.

Place dough in a well-oiled large bowl, brush with oil and let rise in the fridge until doubled in size.  Should stay in the fridge 24 hours and up to 48 hours.  AKA – Cousin Frankie’s hot lead.

Turn dough onto a floured surface and cut into three (3) equal parts.  Form into balls, brush with oil, cover and let sit another hour.

Place dough on fist and use your knuckles to begin stretching dough from the middle, rotating it slightly as you work.  I can see my grandmother doing this like it was yesterday.  Set on surface and continue to stretch from all sides to form a rough 10 by 14 inch rectangle.  (Hey, I’m a traditionalist and always form a circle, as shown above).

Transfer dough to a lightly oiled 9 by 13 inch rimmed baking sheet, pulling the edges to fill the pan.

Pizza I cooked.

Stock photo, but you get the idea.  Should be thinner.

At this point the rest is up to you.  Use your favorite toppings, make three different pizzas, or go with Grandma’s trusted family favorite.  She would start by putting a thin coating of gravy (there’s that family thing again) you can top with very thin slices of tomatoes.  Next came the cheeses, shredded Mozzarella, droplets of fresh Ricotta and a sprinkle of grated Parmesan.

Place your Pizza in a preheated 475° oven and cook until the crust is golden brown and crispy.  Usually anywhere between 15 an 18 minutes.  Remove form the oven and sprinkle fresh chopped basil over the top. Cousin Frankie also tells me that from time to time she would add sauté onions to the mix.  I, of course add chopped garlic or garlic powder as well.

There you have it, the perfect Pizza for a Friday night or any night!


Enhanced by Zemanta